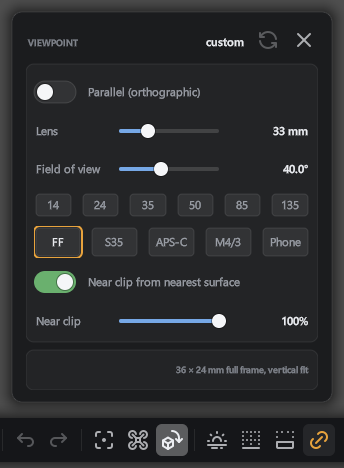
The Viewpoint card places the camera at a named pose and sets its lens.
The card's title shows the pose the camera is at; it shows "custom" after you drag the view. The lens is read on a camera body, and the body's sensor size is shown at the foot of the card, for example "36 × 24 mm full frame, vertical fit". Every slider returns to its default on a double-click; the Reset button restores all defaults.
Choosing a body keeps the picture exactly as it is and changes the millimetres the Lens reads, so a view can be matched to a real camera.
isometricThe classic isometric view from above a corner.
iso 2:1The 2:1 isometric used for pixel art, where each diagonal line steps two pixels across for one down.
frontA view of the model from the front.
rightA view of the model from the right.
backA view of the model from the back.
leftA view of the model from the left.
topA view of the model from the top.
bottomA view of the model from the bottom.
Parallel (orthographic)The camera draws without perspective, keeping parallel lines parallel and sizes equal at every distance.
Isometric views use orthographic projection.
LensThe focal length in millimetres, 12 mm to 400 mm.
The track is logarithmic so the wide lenses have room. A shorter lens sees more of the scene; a longer one sees less and flattens depth.
Field of viewThe vertical angle of view in degrees, from about 3 degrees to 90 degrees.
The default is 40 degrees. Moving either this or Lens moves the other.
14Set Lens to 14 millimetres.
24Set Lens to 24 millimetres.
35Set Lens to 35 millimetres.
50Set Lens to 50 millimetres.
85Set Lens to 85 millimetres.
135Set Lens to 135 millimetres.
FFCamera body: 36 × 24 mm full frame.
S35Camera body: 24.9 × 18.7 mm Super 35.
APS-CCamera body: 23.6 × 15.6 mm APS-C.
M4/3Camera body: 17.3 × 13 mm Four Thirds.
PhoneCamera body: 9.8 × 7.4 mm phone sensor.
Near clip from nearest surfaceThe camera's near clipping plane moves in to stand just short of the nearest surface in view.
This switch is on by default. A close-up of a surface stays whole.
Near clipBrings the near clipping plane closer to the camera, as a share of where it would otherwise sit.
The slider ranges from 1% to 100%, with a default of 100%. Use this for work very close to a surface.
Camera
Cameras
Switch between named views of the scene and key camera positions as the animation plays.
The scene's cameras are listed as cells in the card. Pressing a cell cuts the view to that camera at the current playhead position. Each cut is recorded as a row on the timeline, named after the camera.
Add cameraAdd a camera at the current view.
Look throughShow the view through the picked camera.
Key cameraKey the picked camera's position at the playhead.
Aim at selectedKeep the selected object in view as the camera moves.
While this is on, the button reads "Following".
RemoveRemove the picked camera.
NameThe name of the camera in use, so cameras can be told apart.
Camera
Places
Saves and opens named views inside a capture.
The card appears when a photographed scene made of splats is open. Places are shown as cells. Pressing a cell moves the camera to that place. Each capture file keeps its own places. The D-pad on a game controller steps through them. The line at the foot names where the capture opens.
Place nameThe name to save this place under.
The place is numbered if this box is left empty.
AddSaves the current view as a place.
The view is saved with the name in the box, or numbered if the box is empty.
Start hereThe capture opens at this place from now on.
The capture loads at this place when the file is opened next.
RemoveDeletes this place.
The place is removed from the capture.
Look
Environment
The Environment card picks the panoramic HDR image that lights the model and stands behind it.
The card displays a gallery of HDR maps as picture cells. Pressing a cell switches to that map. The name of the map under the pointer shows beneath the gallery. The H key opens and closes this card; the H beside the title indicates this. Buttons beside the title add your own HDRIs to the gallery and remove maps you have added.
Beneath the Sun slider is a colour picker that sets the sun's colour and has a Kelvin mode; its controls are documented on the Colour page. The Backdrop section sets what stands behind the model. A colour picker beneath the Backdrop cells sets the backdrop colour, the top colour of the gradient, and the colour that maps or pictures are blended over. The backdrop folder button opens the folder where backdrop pictures are stored. Every slider returns to its default on a double-click. The card's Reset button restores all defaults.
No environmentThe first cell of the gallery; the model is lit without a map.
SunTurns the environment map around the model, moving the sun and every light. Range 0 to 360 degrees.
Lights the modelWhether the environment map lights the model.
When off, the Strength slider is greyed.
StrengthHow strongly the environment map lights the model. Range 0.05 to 2.
colourA flat colour stands behind the model.
gradientA vertical sweep from the picked colour at the top to a darker colour at the bottom stands behind the model.
mapThe environment map itself stands behind the model, turned with the Sun slider.
imageA picture from the backdrop folder stands behind the model, scaled to cover the whole view.
FalloffHow much darker the bottom of the gradient is than the picked colour. Range 0 to 0.9.
Works with the gradient backdrop.
BlendHow strongly the map or picture covers the backdrop colour beneath it. Range 0.05 to 1.
Works with the map and image backdrops.
StopsThe brightness of the backdrop in photographic stops. Range -5 to +5.
Applies only to map and image backdrops. Separate from the view's own exposure on the Tone card.
BlurSoftens the map or picture behind the model. Range 0 to 1.
Applies only to map and image backdrops.
Look
Floor
Sets the ground the model stands on and controls its appearance.
The floor catches the model's shadows, contact darkening, and reflections. The toolbar button switches the floor on and off and opens this card; the F key also switches it. Use the icon buttons beside the title to add a custom floor material or remove one you added.
Built-in materials are shown as tiles and repeat at 60 cm per tile at Scale 1, with colour, relief and roughness. Every slider returns to its default when double-clicked, and the Reset button restores every control to its default.
FloorShows or hides the floor.
Same state as the toolbar button and the F key.
GridDraws ruled grid lines on the ground.
The grid works with the floor on or off; without the floor, the grid is drawn on its own.
neutralPlain untextured floor.
The default material.
marblePolished marble.
tilesTiled floor.
woodWooden floor of long boards.
planksRough plank boards.
metalMetal tread plate with raised diamond pattern.
rockNatural rock.
groundBare earth with leaves and grit.
concretePoured concrete.
showroomDark polished stone with wavy veins.
pavingOutdoor paving stones.
grassLawn.
carpetCarpet.
ScaleMultiplier for material tile size.
Range 0.1 to 8, default 1. At Scale 1, each tile is 60 cm wide. The track is logarithmic. Type a number for a precise value.
Pan XSlides the material sideways across the floor.
Range -4 to 4 tiles, default 0.
Pan YSlides the material along the other floor axis.
Range -4 to 4 tiles, default 0.
RotationTurns the material on the floor.
Range 0 to 360 degrees, default 0.
HeightRaises or lowers the ground.
Affects floor, grid, shadows and contact darkening. Range is one quarter of the model's largest dimension up or down. When a model includes its own floor, use this to position the floor on or beneath it.
Seen from belowDisplays the floor from below.
When on, the floor stays visible with its underside showing as the camera passes beneath it. When off, the floor fades away. Default is off.
Look
Lighting
The card places studio lights around the model and sets how all lights behave.
The card places three studio lights (Key, Fill and Rim) around the model. It also controls the file's own lights, the model's glowing surfaces, shadows, falloff and patterns. When "Point lights" is off, the model is lit by an automatic three-light rig, and a line reads "Lit by the automatic rig". When "Point lights" is on, the three lights appear as handles on a dome and can be repositioned by dragging. Press a light to pick it; the picked light's name, colour, distance, intensity and size appear below.
Distances are measured in model radii, the radius of the sphere that frames the model. This means the same numbers work for objects of any size. The colour picker's controls are documented on the Colour page. Every slider returns to its default on a double-click, and the card's Reset button restores every default.
The EMITTERS section appears only when the model has glowing surfaces. Custom images can be added to the GOBO section and appear as picture cells below the built-in patterns.
Point lightsSwitch between placed lights and the automatic rig.
With Point lights off, the automatic three-light rig lights the model. With Point lights on, the three placed lights on this card light the model.
KeyTurn the key light on or off.
The key is the main light.
FillTurn the fill light on or off.
The fill light lifts the shadows.
RimTurn the rim light on or off.
The rim light lights the model's edge from behind.
DistanceHow far the picked light stands from the model.
The range is 1.1 to 8 model radii.
IntensityHow bright the picked light is.
The range is 0 to 4.
SizeHow large the picked light is.
The range is 0.02 to 1. A larger light gives softer shadows and broader highlights.
NoneThe picked light's intensity is set by the Intensity slider.
This is the default in the DRIVE BY section. The other cells in this section are objects in the scene. Picking one drives the light's intensity from its distance to that object, and four sliders appear below.
NearThe distance at which the light takes its "At near" intensity.
The range is 0 to 8 model radii.
FarThe distance at which the light takes its "At far" intensity.
Between Near and Far, intensity moves smoothly from one to the other.
At nearThe intensity at the Near distance.
The range is 0 to 4.
At farThe intensity at the Far distance.
The range is 0 to 4.
FileThe whole group on or off
Switch for all the lights stored in the model file.
GlowingThe whole group on or off
Switch for the model's glowing parts acting as lights on the scene.
CastingLamps and spots that cast shadows at once
A number with minus and plus buttons, 0 to 8.
ShadowsAll shadows on or off
Contact shadowsDarkens where a part meets a surface
SoftSoftens shadow edges while the camera moves
Four positions with minus and plus buttons: Off, Main (the main light's shadow), Distance (softness grows with distance from the object casting it), All (lamps and spots as well).
Rendering cardOpens the Rendering card.
The Rendering card is where the key light's ray-traced shadow is set.
three-pointThe default rig: a warm key front-left, a cool fill, an amber rim behind.
rembrandtA high, hard key at 45 degrees and a faint fill.
This is the classic triangle of light on the shadowed cheek.
butterflyThe key high over the camera with a broad soft fill beneath.
splitOne light square from the side, lighting half the model.
rimTwo lights behind the model and a weak front light.
This setup creates a strong silhouette.
productLarge, near-white, even light, as in a catalogue photograph.
windowedLight fades with the square of distance and ends smoothly at the edge of its reach.
This is the default falloff.
1/d²Physical inverse-square fading with endless reach.
linearLight fades in a straight line to the edge of its reach.
flatConstant brightness at every distance, like sunlight from a placed lamp.
Emitters / StrengthHow bright the model's glowing surfaces are.
The range is -4 to +10 stops. This slider appears only when the model has glowing surfaces.
Shadow / SoftnessHow soft the edge of the key light's shadow is.
noneThe light casts no pattern.
This is the default.
stripesCasts stripes through the lights.
Like a stencil in front of a lamp.
windowCasts a window frame through the lights.
Like a stencil in front of a lamp.
dappleCasts dappled light through the lights.
Like a stencil in front of a lamp.
causticsCasts moving water caustics through the lights.
The Phase slider moves them.
leavesCasts moving leaves through the lights.
The Phase slider moves them.
RepeatHow many times the pattern repeats across the light.
The range is 0 to 8. At 0 the pattern tiles endlessly.
OutsideWhat the light does outside a pattern that has an edge.
The range is 0 (blocked, like the wall around a window) to 1 (open, like sky around leaves).
ScaleThe size of the pattern.
The range is 0.1 to 8 on a logarithmic scale.
Pan XSlides the pattern across the light horizontally.
The range is -4 to 4.
Pan YSlides the pattern across the light vertically.
The range is -4 to 4.
RotationTurns the pattern.
The range is 0 to 360 degrees.
Gobo / SoftnessBlurs the pattern's edges.
The range is 0 to 1.
Gobo / StrengthHow deeply the pattern darkens the light.
The range is 0.05 to 1.
PhaseMoves the animated patterns through their cycle.
This applies to the caustics and leaves patterns.
Look
Colour
Pick a colour for this element from presets, a temperature scale, hex code, or sliders.
The colour picker sets the colour of the element on this card. The title line shows the current colour as a swatch and its hex code. For a light (lamp or sun), the colour controls hue only, and a note says "Hue only - brightness is Intensity" because the light's brightness is set by the Intensity slider on the same card. A light picker has Kelvin and Custom modes. For a backdrop or surface, the picker has Custom controls and its own Brightness slider.
Every slider returns to its default on a double-click.
KelvinColour temperature mode: pick from presets or the Temperature slider.
In this mode the colour is set as a colour temperature in kelvin. Choose from the preset swatches or use the Temperature slider to set any temperature.
CustomColour mode: set the colour freely with hex, R G B, hue and saturation.
In this mode the colour is set with individual controls: type a hex code, set red/green/blue values, or use the Hue and Saturation sliders.
candle1900 K preset swatch.
tungsten2700 K preset swatch.
warm white3200 K preset swatch.
neutral4000 K preset swatch.
daylight5600 K preset swatch.
overcast6500 K preset swatch.
shade7500 K preset swatch.
TemperatureColour temperature slider from 1700 K (deep orange) to 12000 K (blue).
The track shows the colours it passes through as you change the temperature.
HexType a colour as a hex code such as #FF0000.
Only hex digits and the # symbol are accepted.
R G BRed, green and blue values, each 0 to 255.
Type a value into a box, or drag across a box to change it one level per pixel.
HueHue around the colour wheel, in degrees.
SaturationHow strong the colour is, from grey to full colour, in percent.
BrightnessHow light or dark the colour is, in percent.
This slider appears only on pickers that carry their own brightness: backdrops and surfaces.
Look
Tone
The card adjusts the picture's exposure, tone curve and colour channel.
The image viewer has the same card on the same tone mapper, so an HDR image and a 3D model can be graded the same way. Its sections are titled OPERATOR and CHANNEL. Every slider returns to its default on a double-click; the card's Reset button restores every default.
ExposureBrightens or darkens the picture in photographic stops.
The slider ranges from -5 to +5, with a default of 0. When a file carries an exposure of its own, the readout shows the total the picture is drawn at.
GammaAdjusts the display's brightness transfer curve.
The slider ranges from 1.0 to 3.0, with a default of 2.2. 2.2 suits ordinary displays; 1.0 is for a display that applies its own transfer curve.
LinearBrightness is shown as it is and everything brighter than white is clipped to white.
ReinhardRolls bright values off smoothly towards white.
ACESThe ACES filmic curve used in film production.
ACES is the default operator.
FilmicThe Hable filmic curve, with a soft toe in the shadows and a soft shoulder in the highlights.
RGBThe full-colour picture.
RGB is the default channel.
ROnly the red channel, shown in grey.
GOnly the green channel, shown in grey.
BOnly the blue channel, shown in grey.
AThe alpha (transparency) channel, shown in grey.
LumThe luminance (perceived brightness), shown in grey.
Look
Effects
The card sets the picture's finishing effects.
The Effects card gathers bloom, ambient occlusion, bounced light, depth of field, lines and antialiasing in one place. On a wide pane the controls sit in two columns. Every slider returns to its default on a double-click, and the card's Reset button restores all defaults at once.
Lines draw ink over the model. The Ink Colour picker sets the lines' colour; its controls are documented on the Colour page.
Bloom / StrengthHow strongly bright areas glow into their surroundings, 0 to 1.
At 0 bloom is off.
ThresholdHow bright a pixel must be before it glows, 0 to 4.
SizeHow far the glow spreads, 0.25 to 4.
Background glowsThe backdrop and environment glow as well as the model.
Ambient occlusion / StrengthHow strongly creases and corners where light struggles to reach are darkened, 0 to 2.
RadiusHow far the darkening reaches from a crease, 0.02 to 1.
Bounced lightLight bounces off surfaces onto others, so colours spill between nearby parts.
Uses the graphics card's ray tracing. When the frame rate falls too low it pauses by itself.
Depth of fieldBlurs what is in front of and behind the focus distance, like a camera lens.
FocusMoves the plane in focus nearer or further from the point the camera looks at, -1.5 to 1.5.
The middle is the camera's target.
RangeHow deep the sharp zone around the focus plane is, 0.05 to 2.
Depth of field / StrengthHow strongly the out-of-focus areas blur.
roundRound aperture shape.
3Triangle aperture shape.
4Square aperture shape.
5Pentagon aperture shape.
6Hexagon aperture shape.
7Heptagon aperture shape.
8Octagon aperture shape.
9Nonagon aperture shape.
RotationTurns the aperture polygon, 0 to 360 degrees.
SilhouettesDraws lines along the model's outline.
CreasesDraws lines along sharp edges inside the model, where faces meet at an angle.
Against backgroundDraws lines wherever anything meets the background, including the far edge of the floor.
ThicknessLine width in pixels, 1 to 12.
OpacityHow solid the lines are, 0.05 to 1.
AngleHow sharp an edge must be to count as a crease, 5 to 90 degrees.
solidSolid line style.
dashedDashed line style.
dottedDotted line style.
offHard pixel edges, useful for sprite captures.
jitterEdges, soft shadows, ambient occlusion and bokeh smooth out over a few frames while the view is still.
2xMultisampling at 2 samples makes edges smooth from the first frame, which helps while dragging.
This keeps the jitter smoothing as well.
4xMultisampling at 4 samples makes edges smooth from the first frame, which helps while dragging.
This keeps the jitter smoothing as well.
Look
Cartoon
The Cartoon card renders the scene in a drawn style with simplified paint, flat lighting bands, edge lighting, a printed halftone screen and posterised colour.
The Cartoon card applies a sequence of effects to create a hand-drawn appearance: simplified surface colours (PAINT section), light organized in flat bands (CEL section), rim lighting (RIM section), a halftone pattern overlay (HALFTONE section), and posterised colour (POSTERISE section). On a wide pane these sections lay out in two columns. For ink outlines, use the LINES section of the Effects card.
Every slider returns to its default on a double-click. The card's Reset button restores every slider to its default. Sliders that read 'off' at their lowest end switch that part of the look off. The three cells in the PATTERN section select the shape of the halftone screen.
OnTurn the Cartoon look on and off.
The switch controls the entire effect. Slider settings are preserved while the Cartoon effect is off.
FlattenSimplifies surface colours towards flat areas.
This slider in the PAINT section ranges from 0 (off) to 1, collapsing surface variation into unified colour regions.
BandsSplits the light into flat levels.
This slider in the CEL section creates 2 to 8 flat lighting bands; its lowest end is off. Reflections on metals are banded too.
SoftnessSoftens the edge between light bands.
This slider in the CEL section ranges from 0 to 1, smoothing the transition at each band boundary.
RimControls the brightness of light along the model's edges.
This slider in the RIM section ranges from 0 (off) to 4.
Rim widthControls how wide the rim of light appears.
This slider in the RIM section ranges from 0.05 to 1; a thin rim reads as a highlight while a wide one appears as an outline of light surrounding the model.
HalftoneBreaks band edges into a printed screen pattern.
This slider in the HALFTONE section ranges from 0 (off) to 1 and applies a halftone effect to the boundaries between light bands. The effect activates once Bands is on.
Dot sizeControls the size of the halftone screen dots.
This slider ranges from 3 to 40 pixels and controls the scale of the screen pattern.
Screen angleRotates the halftone screen pattern.
This slider ranges from 0 to 90 degrees and turns the screen, following the conventions of printed screens.
This slider in the POSTERISE section ranges from off at its lowest end up to 16 flat levels per colour channel, simplifying the image's colour palette.
Look
Accumulated
The card renders depth of field, soft shadows and motion blur by accumulating frames while the view is still.
The card averages many slightly different pictures over successive frames, so the picture refines while the view is still. It renders real lens blur, soft shadows from the point lights and motion blur. These effects cost frame rate. The card is organized into two sections: Lens for depth of field, and Motion for motion blur.
Every slider returns to its default on a double-click. The card's Reset button restores every default.
OnTurns accumulation on.
Lens blurReal depth of field from a camera lens, with true bokeh.
Point light shadowsThe point lights cast soft shadows whose width follows each light's Size.
Motion blurMoving objects in an animation blur along their motion.
ApertureHow wide the lens opens, 0% to 25%; a wider opening blurs more.
FocusThe focus distance as a multiple of the distance to the camera's target, 0.05× to 4×; 1.00× focuses on the target.
BladesThe shape of the out-of-focus highlights: circular at the low end, then a polygon of 3 to 11 blades.
RotationTurns the blade polygon, 0 to 360 degrees.
ShutterHow long the shutter stays open, as a shutter angle from 0 to 360 degrees: 360 blurs over the whole frame interval and 0 freezes motion, as in cinema cameras.
Look
Volumetric
The card fills the air around the model with haze that the lights shine through, so beams and shafts of light show in the air.
The haze amounts are measured against the model's own size, so a small earring and a building haze over the same share of the picture. Every slider returns to its default on a double-click; the card's Reset button restores every default.
The card holds three sections. IN THE AIR names which lights shine through the haze. MEDIUM controls the haze itself, with a colour picker documented on the Colour page. QUALITY sets the haze's fineness. A note on the card states "Density thickens the air; Glow brightens it alone."
OnTurns the haze on and off.
Key lightThe key light shines through the haze.
Point lightsThe placed point lights shine through the haze.
EmissiveThe model's own glowing surfaces light the haze.
DensityHow thick the haze is, 0.005 to 2.
Thicker haze also dims the model behind it.
HeightHow high above the floor the haze reaches before it thins away, 0.1 to 8 model heights.
At the top of the range the haze is even throughout, as in a room full of fog.
GlowBrightens the light in the haze while leaving its thickness as it is, 0 to 8.
ScatterWhich way the haze sends light, -0.9 to 0.9.
Positive values send light forward, so beams blaze when the camera looks towards the light; 0 sends it evenly; negative values send it back towards the light.
draftFastest haze.
mediumMedium haze.
highFine haze.
ultraFinest haze.
Bloom the hazeBloom from the Effects card also glows around the bright shafts in the haze.
Look
Volume
Set a volume's density, droplet size, colour and light, with presets for clouds, smoke and fire.
The card appears when the file is a volume: a three-dimensional grid of density values such as a cloud, smoke or fire simulation. A sequence of volume files plays as an animation on the time dock. The card has three sections: PRESETS holds material templates, MEDIUM holds the volume's density and appearance, and LIGHT controls how the key light and sky light pass through it.
Each preset sets the whole medium in one press: its density, colour, droplet size and glow. The sky light and inner glow settings stay as they are.
Every slider returns to its default on a double-click. The card's Reset button restores every default.
CloudSet the volume to look like a cloud.
FogSet the volume to look like fog.
SteamSet the volume to look like steam.
SmokeSet the volume to look like smoke.
SootSet the volume to look like soot.
FireSet the volume to look like fire.
DustSet the volume to look like dust.
DensityHow dense the volume is, as a multiple of the file's density.
The density slider ranges from 0 to 4, with a default of 1.
DropletsThe size of the droplets the light scatters off.
The droplets slider ranges from 5 to 50 micrometres, with a default of 20. The size shapes how light passes through the medium, as in real clouds of that droplet size.
Sky lightHow strongly the sky lights the volume.
The sky light slider ranges from 0 to 4, with a default of 1.
Fire glowHow brightly a file's temperature or flame data glows.
The fire glow slider ranges from 0 to 4, with a default of 1. The glow shows the colours of heated material from deep red to white.
Inner glowLight that bounces inside the volume brightens its interior.
Inner glow is on by default. Light that bounces many times inside the volume is carried round it, which brightens the inside of thick clouds.
Look
Traced effects
The card chooses ray traced effects and controls texture map streaming into memory.
Ray tracing is an option layered on the everyday picture; each switch adds accuracy at some cost in frame rate. The first four controls enable ray traced effects.
The TEXTURES section controls how texture maps stream into memory. As the camera approaches, each map grows toward the size the view needs, limited by maximum size (Largest), minimum size (Smallest), and graphics memory (Budget). The Capture a still card's "Trace saved images" option renders saved pictures with all four ray traced effects. Reset restores every default.
Ambient occlusionThe darkening in creases and corners is ray traced, following the true shape.
Key shadowThe key light's shadow is ray traced, sharp where objects touch.
The shadow is softer further away.
Specular occlusionReflections are darkened where surroundings are hidden from a surface.
This happens inside crevices.
TransmissionLight passing through glass and other see-through materials is ray traced.
1K1024-pixel maximum or minimum texture size.
In the Largest row, 1K caps maps at 1024 pixels. In the Smallest row, 1K makes 1024 pixels the size every map keeps at least.
2KMaps grow up to 2048 pixels.
4KMaps grow up to 4096 pixels.
fileMaps grow up to the full size stored in the file.
autoThe viewer chooses the starting size or graphics memory budget.
In the Smallest row, the viewer chooses the starting size. In the Budget row, the viewer chooses how much graphics memory textures may use.
256The smallest size every map keeps, in pixels.
512The smallest size every map keeps, in pixels.
1 GBHow much graphics memory texture maps may use.
2 GBHow much graphics memory texture maps may use.
4 GBHow much graphics memory texture maps may use.
Rigging
Fit a skeleton
Fits a skeleton to a model so it can be posed and animated.
The fit finds the body's joints by itself, including fingers and toes, and takes a few seconds. Bones take standard names, so animation clips made for common skeletons play on the figure. A line on the card shows how many bones the skeleton has.
The buttons change as you work: Stop appears while a fit runs, Place points and Clear points guide the fit with manual landmarks, Rig the shape creates a skeleton from the model's shape alone, and the joint tools appear once there is a skeleton to adjust.
Fit a skeletonFits a skeleton to the model; once there is one, reads "Fit again".
StopStops the fit.
Place pointsLets you press points on the model to guide the fit: the top of the head, each hand and each foot; the card names the next point.
Clear pointsRemoves the placed points.
Rig the shapeFits a skeleton that follows the model's shape, for a model that is not a standing figure; bones carry plain names.
Adjust jointsShows the joints on the model so you can drag them into place; press again to finish.
Remove skeletonTakes the fitted skeleton out; a skeleton that came in the file stays.
Use as characterAdds the rigged model to the character library so animation clips can play on it.
Export modelSaves the model with its skeleton, skin weights and clips to a .glb or .fbx file you choose.
Move this joint onlyDragging a joint moves that joint alone; when off, the joints below it move with it.
XShows the held joint's position along its X axis.
Drag to move it a millimetre per pixel, or type a value.
YShows the held joint's position along its Y axis.
Drag to move it a millimetre per pixel, or type a value.
ZShows the held joint's position along its Z axis.
Drag to move it a millimetre per pixel, or type a value.
CenterMoves the held joint to the middle of its limb.
RefitPuts the held joint back where a fresh fit would place it.
MirrorMoves the held joint's partner on the other side of the body to its mirror image.
Add boneAdds a bone under the held joint, for a tail, an ear or a strap.
Remove boneTakes the held bone out; its children hang from its parent and its skin goes to the parent.
ReachHow far the held bone's influence reaches into the skin, 0.1 to 4, default 1.
FalloffHow gradually the influence fades beyond the reach, 0.05 to 4, default 1.
Rigid piecesSeparate pieces of the model, such as armour plates, follow a single bone whole.
Rigging
Pose a limb
Pose a model with a skeleton, by hand.
The card poses a model that has a skeleton, by hand. While the card is open, the skeleton's joints show as handles on the model; dragging a handle poses it. Closing the card takes the handles away.
The card's title line names the joint being held. The held joint's angles show as X, Y and Z in degrees, in the joint's own axes; they can be typed or dragged. Two cells under A drag choose whether a drag reaches or turns.
ReachesDragging a hand or foot moves it, and the limb above follows it.
TurnsDragging turns the one bone under the pointer.
ChainSet how many bones follow a reach, from 2 to 5 (default 3).
UndoTakes back the last drag.
Clear poseReturns the figure to the pose it had when the card opened.
XShows the held joint's angle around its X axis.
Number boxes display degrees; type a value or drag across the box.
YShows the held joint's angle around its Y axis.
Number boxes display degrees; type a value or drag across the box.
ZShows the held joint's angle around its Z axis.
Number boxes display degrees; type a value or drag across the box.
Key poseKeeps the pose as animation keys at the current frame.
Reset jointPuts the held joint back to its rest angle.
MirrorCopies the held joint's pose onto its partner on the other side of the body.
Rigging
Motion
The card is a library of motion clips that play on the model's skeleton; press a clip to play it.
The clips come from the CMU motion capture library and Quaternius, credited on the card. When the model has no skeleton, a line on the card points to the Fit a skeleton card.
Add a clip fileA clip file of your own is added to the library.
Repair motionMends glitches in a clip as it is put on the character, and leaves the clip file unchanged.
Repair motion is on by default. When it is on, a clip is mended as it is put on your character. A single sample that jumps far from the samples on both sides of it is replaced by the value between them. A knee that bends backwards past straight is brought back to at most 10 degrees past straight. A foot that twists about the shin more than 45 degrees from the direction its knee points is turned back to 45 degrees. Only the motion playing in the viewer is mended, and the clip file on disk is never changed. When the switch is off, clips play exactly as their files hold them. The switch applies to the next clip you press or open.
Rigging
Mannequin colours
The card sets the two colours of the shipped mannequin: its body and its joints.
The setting is global. Your own characters retain their colours from their files. The colour picker's controls are described on the Colour page. The Reset button returns the mannequin to the clay preset.
clayNeutral clay with darker joints, the default for judging motion.
boneBone white with dark joints.
slateDark slate with light joints.
authoredThe mannequin's own colours from its file.
bodyThe colour picker edits the body's colour.
jointsThe colour picker edits the joints' colour.
Rigging
Character
A motion file plays on a body you choose from the characters shown on the card.
The bodies appear as cells: the mannequin that ships with Heimdall3D and any rigged models of your own. When a character is added, the card reports whether every joint of the motion reaches it.
Add a modelA rigged model of your own becomes a character.
Open folderThe folder where your own characters are kept opens.
A model file dropped into that folder becomes a character.
Animation
Animation
The card lists animation clips in a scrolling grid; press one to play it, and its name appears at the top right.
The current clip's cell is highlighted. Play and loop controls are on the Timeline dock, which runs the same clock as the animation.
Play in placeThe model stays on the spot during the clip.
A jump still rises and falls through its motion.
Show rigThe skeleton appears over the model during playback.
Animation
Key shape
This card shapes animation keys: their type, the motion curves between them, how handles are computed, and where the motion eases.
The card shapes the animation keys you have picked. Each key type is drawn in its own colour on the timeline.
KeyA main pose.
BreakdownThe pose between poses; it keeps its share of the time when the keys around it move.
HoldA pose held still.
ExtremeThe furthest point a motion reaches.
StepThe value holds until the next key, as for a stop-motion pose or a switch.
Curve / LinearThe default: the value moves in a straight line to the next key.
BezierA smooth curve shaped by the keys' handles.
BounceSettles onto the next key in a run of shrinking hops.
ElasticOvershoots and springs about the next key before settling.
AutoThe default: smooth through the neighbouring keys and level at a peak or a dip.
PlateauLike Auto, with every peak and dip falling exactly on a key, so the curve stays within the key values; the safe choice for a whole channel.
ClampedLike Auto, and level wherever two neighbouring keys hold nearly the same value, so a held value stays held.
FlatLevel handles on both sides.
Tangents / LinearHandles aimed straight at the neighbouring keys.
FreeThe handles stay exactly where you place them.
InThe motion eases into the key.
OutThe motion eases out of the key.
BothThe default: the motion eases at both ends.
SineGentlest ease preset; sets the keys' handles to that curve at the end chosen under EASE.
QuadEase preset; sets the keys' handles to that curve at the end chosen under EASE.
CubicEase preset; sets the keys' handles to that curve at the end chosen under EASE.
QuartEase preset; sets the keys' handles to that curve at the end chosen under EASE.
QuintEase preset; sets the keys' handles to that curve at the end chosen under EASE.
ExpoStrongest ease preset; sets the keys' handles to that curve at the end chosen under EASE.
BackOvershoots slightly before arriving; sets the keys' handles to that curve at the end chosen under EASE.
Animation
What a key holds
Choose which animation channels Add key writes.
The card opens from the button beside Add key on the Timeline dock. The button's word names the current choice. The card chooses which channels Add key writes, sets a breakdown between two keys, and clears every animation key.
AllAdd key writes every channel: position, rotation and scale.
MoveAdd key writes position alone.
TurnAdd key writes rotation alone.
ScaleAdd key writes scale alone.
BetweenWrite a breakdown key at the playhead, between the key before and the key after.
At 0 it matches the key before, at 1 the key after, and past either end it overshoots. Range is -0.5 to 1.5 with a default of 0.5.
Clear all keysRemove every animation key in the scene.
The action asks once more before clearing.
Animation
Timing
Set the frame rate and how times are shown.
The card opens from the Timing button on the Timeline dock. It sets the frame rate the scene's range counts in and chooses how times are shown: as frame numbers or as timecode in minutes, seconds and frames. The File's range button returns the scene's range to the range stored in the file.
24Set the frame rate to 24 frames per second.
25Set the frame rate to 25 frames per second.
30Set the frame rate to 30 frames per second.
48Set the frame rate to 48 frames per second.
50Set the frame rate to 50 frames per second.
60Set the frame rate to 60 frames per second.
FramesTimes are shown as frame numbers.
TimecodeTimes are shown as timecode, in minutes, seconds and frames.
File's rangeSet the scene's range back to the range stored in the file.
Scene
Scene
The Scene dock lists every object in the view, so you can select, arrange and limit their textures.
The dock lists everything in the scene as a tree: the models, the lights (the studio rig, the file's lights and the glowing parts) and the cameras. Pressing a row picks it; the buttons below act on the picked rows. A line above the list sums up the lights. The dock stays open until the toolbar button or the close button at its top right closes it; the view makes room for the dock.
The TEXTURES section sets texture limits for the picked object alone. The SCENES section lists the saved scenes that already hold this model; press a scene twice to open it. When there are none, a line says so. Every control on the dock shows its default, and the dock's Reset button restores every default.
Save sceneSaves the whole scene, with every object, its position and the look, as a scene file.
Load sceneOpens a saved scene file.
Lighting cardOpens the Lighting card, where the studio rig is set.
Add a modelAdds another model file to the scene.
AttachMakes the picked object follow another object as it moves and animates.
Pick an object in the list and press Attach, then click the object it should follow, either in the picture or in its row in the list. Esc cancels. The object stays exactly where it stands, and from then on it moves, turns and plays its keyframes together with the object it follows. Objects can follow in a chain, such as a cup on a tray on a cart.
When you click a character with a skeleton, the picked object follows the joint nearest the click, or the joint picked on the Pose card if one is picked. A sword clicked onto a hand follows that hand through a walk or any animation clip. While an object follows something, the button reads Detach. Pressing it lets go, and the object stays where it is at that moment.
DuplicatePuts a copy of the picked object beside it and picks the copy.
Duplicate sets a copy of the picked object one object-width beside it along X and picks the copy. Copies are named after the original with a number, such as "Chair 2" and "Chair 3". A copy of a group copies everything in it, a copy of an object carried by a group or a hand stays with that group or hand, and a piece row copies just that part. Ctrl+D duplicates the picked object; Ctrl+C copies it and each Ctrl+V puts a copy one step further along, including after opening another model, so an object can travel from one scene to another. Copies share the original file's model data, so they open instantly and add almost no memory. Undo takes a duplicate back out.
Add light
Add light places a new Point, Spot, Sun or Area light in the scene and picks it. The light appears above the model on the side facing the view, aimed at the model's centre, and bright enough to light the model about as much as the main key light does. A light is an object in the scene. Its row is in the list, and you can pick it by pressing its round marker in the view. Move and turn it with the move and turn tools or by typing values, hide it with its eye, key it on the timeline, or duplicate it. The row under it switches the light on and off and sets its shadow, and the light is saved with the scene.
PointShines in every direction from one spot.
SpotShines a cone of light in the direction it faces.
SunLights the whole scene from one direction; only which way it faces matters, not where it stands.
AreaA glowing flat rectangle that lights softly, like a window or a softbox.
Light
The Light section appears in the Scene dock while a light you added to the scene is picked. Its four tiles, Point, Spot, Sun and Area, change the picked light to that type in place. The light keeps where it stands, which way it faces, its colour and its brightness, and a light changed to Area takes an area's usual size while one changed from Area takes a lamp's. Below the tiles you set the light's colour, with a temperature mode in kelvin, its brightness from 0 to 4, its size, its shadow, and the cone width of a Spot.
BrightnessSets how bright the light is; 1.00x lights the middle of the model about as much as the main key light does.
ConeSets how wide the spot's cone is, as its half angle in degrees.
SizeSets the light's size compared with the model; a bigger light gives softer shadows, and an Area light's rectangle grows with it.
ShadowSets whether the light casts shadows.
RemoveTakes the picked object out of the scene.
Name this objectThe name that Rename gives the picked row, or that Group gives a new group.
GroupMakes a group of the picked objects; moving the group moves them all.
RenameGives the picked row the name in the box.
Override globalThe picked object's own texture limits below replace the Traced effects card's for this object.
1KThe picked object's maps grow up to 1024 pixels.
2KThe picked object's maps grow up to 2048 pixels.
4KThe picked object's maps grow up to 4096 pixels.
fileThe picked object's maps grow to the full size in its file.
autoThe viewer chooses the smallest size the picked object's maps keep.
256The picked object's maps keep a minimum size of 256 pixels.
512The picked object's maps keep a minimum size of 512 pixels.
Open the folderOpens the folder the scene was saved in.
Scene
Move, rotate and scale
Show the picked object's position, rotation and scale as X, Y and Z.
The card opens from its button on the edit rail, the column of editing tools on the left of the view. It shows the picked object's numbers for the tool that is held: Move shows position, Rotate shows rotation, and Scale shows size. Each number can be typed for an exact value or dragged. The card notes that holding Ctrl snaps to 15 degrees, 0.1, and steps of 0.1 times.
XShows the picked object's X value for the held tool.
Move shows position, Rotate shows angle, Scale shows scale. Type a value or drag across the box.
YShows the picked object's Y value for the held tool.
Move shows position, Rotate shows angle, Scale shows scale. Type a value or drag across the box.
ZShows the picked object's Z value for the held tool.
Move shows position, Rotate shows angle, Scale shows scale. Type a value or drag across the box.
LevelTake the tilt out of the picked object and keep the way it faces.
ZeroReturn the held tool's three numbers to their defaults.
UniformScale all three axes as one, so the object keeps its proportions.
Scene
Timeline
Manage animation keys and playback across time.
The dock runs along the bottom of the view. It opens from the Timeline button, and entering the Animation section opens it. The picture makes room for it.
The transport controls in the top row step through frames and keys, play the scene, record the animation to a file, set the playback range and choose the loop mode. The buttons labeled All, Move, Turn and Scale specify what channels a new key will hold; pressing any of them opens the card where the choice is made.
Current frameShows the frame the clock is on.
Type a frame to go there or drag across the box.
StartSets the first frame of the scene's range.
EndSets the last frame of the scene's range.
RowsShows the keys as rows, one row per animated object or setting.
Press a key to pick it. Ctrl+click adds a key to the picked keys, and Ctrl+click on a picked key takes it out. Shift+drag across the lanes draws a box and picks every key inside it, across as many rows as it covers, and Ctrl+Shift+drag adds the box to what is already picked. Dragging any picked key moves all the picked keys together. Ctrl+C copies the picked keys (in the Graph, the keys picked there), and Ctrl+V pastes them at the playhead with their spacing in time kept. When the copied keys all belong to one object and another object is picked, they paste onto the picked object, and Undo takes a paste back. A key on an object's top row stands for every channel keyed at that time. Picking a key on the Rows or in the Graph draws the path its object or joint travels between the first and last key in the view. The stretch up to the picked key is amber and the key's mark fills amber, so the first key lights only its own mark and the last key lights the whole path before it, while the rest of the path stays a thin white line.
GraphShows the keys as curves of value over time.
AllNew keys hold every channel.
MoveNew keys hold position only.
TurnNew keys hold rotation only.
ScaleNew keys hold scale only.
Clip to keysTurns the playing animation clip into keys that can be edited.
This button is active when a clip plays.
CamerasOpens the Cameras card, where cameras are added, keyed and looked through.
All actorsEvery character plays its animation together.
This button is shown when the scene holds more than one character.
FrameSets the picked key's frame.
This number box appears in the Graph view. The picked key's frame shows above the curves, where it can be typed or dragged.
ValueSets the picked key's value.
This number box appears in the Graph view. The picked key's value shows above the curves, where it can be typed or dragged.
Second valueShows the second value of a key picked on the rows.
Shown when the key holds more than one channel such as X, Y and Z of a position; set it here.
Third valueShows the third value of a key picked on the rows.
Shown when the key holds more than one channel such as X, Y and Z of a position; set it here.
Scene
Material variants
For a model file that carries material variants, the card lists each variant as a cell, and pressing one shows the model in that variant.
A material variant is a set of colors and textures, such as different color options for a product. The card appears on the toolbar when the loaded file carries variants.
Scene
Reset
The scene returns to its defaults.
The Reset card puts the scene back to its defaults. A separate Reset view button on the toolbar resets the camera alone. The same three reset options appear in the right-click menu under Reset. Any reset can be undone with one Undo press.
EverythingEvery position and the scene's look return to their defaults.
This resets both positions and the scene's appearance. All animation keys are removed. You can press Undo to restore everything.
PositionsEvery moved object returns to where it was, and the camera returns to its default.
Moved objects return to their original positions, and any extra cameras are removed. The main camera returns to its default view. Animation keys on objects and cameras are removed. You can press Undo to restore them.
SceneThe scene's look returns to its defaults.
The environment, lighting, floor, effects and all other settings return to their defaults. Any saved appearance for this file is cleared, and animation keys on settings are removed. You can press Undo to restore them.
Read
Model info
The card displays the open model's properties and carries the tooltips switch.
The card shows properties of the open model: format, triangle and vertex counts, material and texture counts, the model's dimensions in width, depth and height, and its up axis. The tooltips switch here controls tooltips throughout the viewer and the image viewer. One setting applies to both viewers and is kept with the viewer's settings.
TooltipsShows a tooltip when the pointer rests on a control.
When on, the switch shows a tooltip whenever the pointer rests on a control throughout the viewer and the image viewer. The switch is on by default. The image viewer's tone card carries this same switch.
Read
Shading mode
The card picks how the model is drawn: the finished look, one of four wireframe views, or a view of one material property for inspecting a model.
Each mode is a cell with its own glyph; pressing one switches the view. The card's title names the current mode. The Reset button restores the default, shaded.
shadedThe finished model with its materials, textures and lighting.
wire on shadedThe mesh's edges drawn over the shaded, textured model.
wire on flatThe edges drawn over a plain untextured grey surface.
hidden lineThe edges alone, with the surfaces hiding the edges behind them.
see-throughEvery edge, including those the model's own form hides, which are drawn dimmer and thinner so they read as further away.
albedoThe base colour of every surface, unlit.
normalsThe direction each surface faces, shown as colour.
roughnessThe material's roughness shown in grey: white is rough, black is glossy.
metalnessThe material's metalness shown in grey: white is metal.
UV checkerA checker pattern laid on through the model's texture coordinates, which shows stretching and seams in the texture mapping.
backfacesFaces seen from their back side are shown in a colour of their own, which reveals faces pointing the wrong way.
overhangFaces coloured by their angle to the print's up direction, so the places a 3D printer will need supports under are visible. The same view as the switch on the Print section's overhang card.
Edge widthAdjust the width of the wireframe lines in pixels, from 1 to 12.
The slider is active in the four wireframe modes and greyed in the others. Double-click to return to the default width.
Read
How big this is, in millimetres
The card shows the model's dimensions in millimetres.
The SIZE card displays the model's size along X, Y and Z in millimetres. A 3D file stores plain numbers without units, so the card explains how they are read: "Units: from the file" when the file states its unit, "Units: assumed" when Heimdall3D has judged the unit from the model's size, and "Units: not stated" otherwise. The unit cells set how the file's numbers are read in, and this choice is remembered for that file.
mmThe file's numbers are read as millimetres.
cmThe file's numbers are read as centimetres.
inThe file's numbers are read as inches.
mThe file's numbers are read as metres.
Make
Capture a still
The card takes a still picture of the current view at a chosen size, with or without its background, and copies or saves it as a PNG.
The picture leaves out the toolbar. Every choice is set before the press, so a large render is taken right the first time. The size in pixels of the chosen multiple is shown under the size cells.
While the card is open, dragging a rectangle across the view marks a region, and the capture takes only that region; the card shows the region's size in its Region line. After a save, a link to the folder appears.
1×Sets the picture to the pane's own size.
2×Sets the picture to twice the pane's own size.
3×Sets the picture to three times the pane's own size.
4×Sets the picture to four times the pane's own size.
Allow sizes past 8192 pxSizes wider or taller than 8192 pixels become available.
Pictures wider or taller than 8192 pixels take longer and use more memory.
Transparent backgroundThe backdrop is removed and the background is transparent.
The environment still lights the model and shows in its reflections, so a chrome object stays chrome on a transparent background.
Keep ground shadowThe shadow the model casts on the floor stays in the picture.
This is active when Transparent background is on.
Trace saved imagesSaved and copied pictures are rendered with the ray-traced effects.
When off, they follow the Rendering card's switches.
Whole frameSets the region to the whole view.
ClearRemoves the region so the capture takes the whole view.
CopyCopies the picture to the clipboard.
Save PNGSaves the picture as a PNG file in the export folder.
Open the folderOpens the folder the picture was saved in.
Make
Shot templates
Produces the set of pictures and clips a destination asks for in one press.
Pick a template and press Produce to render every shot of the template. A template is a list of shots at the sizes that destination uses, showing the scene from set angles, as turntables, or as wireframe passes.
The templates that follow a destination's published requirements keep to them; the rest are Heimdall3D's own recommendations for that destination. A caption for the post is written from the scene before the run and can be edited on the card; a count beside it measures it against the destination's own limit, and a button beside it restores the generated caption.
An edited template can be saved under a name and appears among the templates. After a run, a link opens the folder the run wrote.
TurboSquidThe five product angles TurboSquid asks for, a wireframe pass and a 36 frame turntable as numbered images.
CGTraderPreview pictures and a turntable for a CGTrader listing.
FabPreview pictures and a turntable for a Fab listing.
ArtStationPreview pictures and a turntable for an ArtStation listing.
Microsoft StorePoster art at 2:3 and a 1920 by 1080 trailer for a Microsoft Store listing.
BehancePictures of a portfolio post for Behance.
CaraPictures of a portfolio post for Cara.
Instagram feedThe picture or clip in the shape that Instagram feed shows.
BlueskyThe picture or clip in the shape that Bluesky shows.
MastodonThe picture or clip in the shape that Mastodon shows.
XThe picture or clip in the shape that X shows.
LinkedInThe picture or clip in the shape that LinkedIn shows.
RedditThe picture or clip in the shape that Reddit shows.
DiscordThe picture or clip in the shape that Discord shows.
YouTubeThe picture or clip in the shape that YouTube shows.
Instagram ReelsA tall turning clip for Instagram Reels.
YouTube ShortsA tall turning clip for YouTube Shorts.
TikTokA tall turning clip for TikTok.
Web stillA still image for web use.
Blog headerA still image for a blog header.
Social squareA square still image for social media.
Social portraitA portrait still image for social media.
Story or shortA tall still image for stories or short posts.
Pin or posterA still image for pins or posters.
Turnaround sheetThe model from the front, right, back and left for a character or product sheet.
Product setA hero view, a detail view and a wide view of a product.
MovieTurntables written as a video file.
StillsTurntables written as numbered images.
BothTurntables written both ways from one run.
FramesHow many frames one turn has; the same controls as the Presentation card for this template's turns.
LengthThe same turn given in seconds.
RateFrames per second a turn plays at.
FrameThe room around the model in every shot; more Frame makes the model smaller in the picture.
ProduceRenders every shot of the template; pressing it again while it runs stops the run.
ResetReturns the template to how it was last saved.
Re-deriveReturns an edited copy to the built-in template it came from.
CaptionThe caption for the post, filled in from the scene and editable here.
Credit Heimdall3DAdds a line crediting Heimdall3D to the caption.
Name this templateThe name the edited template is saved under.
SaveSaves the edited template under the name in the box.
DeleteDeletes a template you saved.
Pick a templateAsks for a template before a run; after a run, opens the folder the run wrote.
Make
Presentation
The model turns on a turntable while the camera and lights stay still or walk around it, and you record one full turn as a sequence of images or video.
The Presentation card runs an automatic turntable: the model rotates continuously in front of the camera. Use it to record a sequence of pictures or video from all angles. A recording captures the model at the size and background you set on the Capture a still card.
Every slider returns to its default when you double-click it. The Reset button restores all settings to their defaults.
TurntableStarts and stops the rotation.
This switch shares its state with the turntable button on the toolbar.
SpeedHow fast the model turns, in degrees per second.
Choose a speed from 3 to 180 degrees per second. The default is 24 degrees per second.
ElevationThe camera's height angle during the turn.
The camera looks at the model from below or above during the rotation. Angles range from 85 degrees below the horizon to 85 degrees above.
Turn the other wayReverses the direction of rotation.
The turntable rotates in one direction by default. Turn this on to rotate in the opposite direction.
Keep the lighting stillThe lights stay fixed while the model turns, like a real turntable.
When this switch is on, the model rotates under fixed lights and the camera stays still. When this switch is off, the camera walks around the model and the lighting rotates with the model. This switch is on by default.
FramesHow many pictures one full turn is recorded as.
The slider ranges from 24 to 360 frames per turn, with a default of 120. You can type a value from 1 to 100000 to set an exact frame count.
LengthThe recording's duration at playback rate.
This shows the same recording expressed in seconds. Typing a length automatically adjusts the frame count to match.
Record PNG sequenceRecords one PNG per frame, saved beside the model.
Record APNGRecords one lossless file that keeps transparency.
Record GIFRecords one file with 256 colours and one-bit transparency.
Record MP4Records one compressed video file.
Make
Record
Records the animation to a file with your choice of format, size, frame rate and sample count.
The card sets which frames are recorded, what kind of file, how fast it plays, how large and how smooth. The turntable on the Presentation card records with the same format, size and samples. Lines at the foot of the card show the recording's final size and what it will cost in time.
StartThe first frame recorded.
The frame number where the recording begins. The range is the same as the Timeline's Start control.
EndThe last frame recorded.
PNGRecord to one PNG file per frame in a numbered sequence.
APNGRecord to one animated PNG file, lossless, keeping transparency.
GIFRecord to one animated GIF file with 256 colours and one-bit transparency.
MP4Record to one compressed MP4 video file.
RateFrames per second the recording plays at.
Choose between 1 and 120; the default is 30. Higher frame rates produce smoother playback and larger files.
PaneRecord at the pane's own size.
512²Record at 512 by 512 pixels.
720pRecord at 1280 by 720 pixels.
1080pRecord at 1920 by 1080 pixels.
8Render each frame with 8 samples.
32Render each frame with 32 samples.
The default. More samples take longer to render and produce a smoother image.
64Render each frame with 64 samples.
Record the animationRecord the frames from Start to End with these settings.
Make
What a lister thumbnail shows
This card sets how Heimdall3D draws thumbnails in folder listings.
The card controls how thumbnails appear in Directory Opus listers and Windows Explorer, as a computer-wide setting that also appears on the Directory Opus Configure page. Changes take effect when a listing next draws its thumbnails. The refresh button redraws the thumbnails in the currently visible folders, and a line beneath it shows the result.
Stamp size in mmPrint the model's size in millimetres on the thumbnail.
This helps sort 3D prints at a glance.
AutoHeimdall3D chooses the renderer for thumbnails.
GPUThumbnails are drawn on the graphics card.
CPUThumbnails are drawn on the processor.
ClearThumbnails have a transparent background.
EnvThumbnails show the environment behind the model.
FlatThumbnails have a flat colour behind the model.
Refresh the folders I am looking atThe thumbnails in the currently open folders are drawn again with the current settings.
Recall
Named setups
Save and load a whole look under a name.
A setup stores the entire look of a scene: environment, lighting, floor, tone, effects and all the other cards' settings. Setups are shared across every file, so a look made on one model can be put on another. The saved setups appear as cells; press one to pick it. Setups saved from another viewer window appear when the card opens.
Name this setupThe name a new setup is saved under, or the new name for Rename.
SaveSaves the current look as a setup with the name in the box.
LoadPuts the picked setup's look on the scene.
RenameGives the picked setup the name in the box.
DeleteDeletes the picked setup.
Recall
Bookmarks
The card keeps camera views for the file that is open.
Each row is one slot: a wide button that takes you to a saved view, and a Save button beside it. Bookmarks are kept per file, so each model has its own set.
emptyThe button shown in this slot before saving a view.
The button reads "empty" and is greyed. Once you save a view in this slot using Save, the button displays the view's name and becomes active to move the camera there when pressed.
SaveSaves the current camera view in this slot.
Save replaces any view that the slot previously held.
Recall
Recently opened
The card shows recently opened files as a grid of pictures, most recent first.
The card displays recently opened files as thumbnail images arranged in a grid, with the most recent at the front. Each thumbnail shows the file as it appeared when last opened. Model files and environment maps display a small mark indicating their type. Files that have been moved or deleted remain in the grid as greyed thumbnails. Pressing a thumbnail opens that file. The name of the file under the pointer appears below the grid. The search box is active when the card opens.
Type to findTyping narrows the grid to files whose names match, best match first.
Typing in the search box filters the grid to display only files whose names match the text, ordered by best match first. Pressing Enter opens the first matching file.
Print
Will it fit the machine
The card shows the model on each 3D printer's build volume.
The BUILD VOLUME card lists 3D printers as cells. Press one to draw that printer's build volume around the model on the floor and see whether the model fits. The chosen printer is remembered for every file. A line shows "No machine chosen" until a printer is selected. For a printer with a round bed, a line on the card says the bed is circular. To add your own printers, create a file named printers.ini in the Heimdall3D folder of your application data.
Print
Where supports will be needed
The card colours faces that overhang too steeply to print unsupported.
The card colours the faces of the model that overhang too steeply to print unsupported, so the places a slicer will add supports are visible before slicing. Faces within 10 degrees of the limit are amber and faces past it are red, as a legend on the card shows. The angle is measured from vertical. Each preset names the slicer whose default it sets.
Show overhangsShows the overhang colouring.
The same view as the overhang cell on the Shading mode card.
Orca 40°Sets the limit to 40 degrees, OrcaSlicer's default.
Cura 45°Sets the limit to 45 degrees, Cura's default.
Prusa 55°Sets the limit to 55 degrees, PrusaSlicer's default.
From verticalSets the overhang limit in degrees from vertical.
The limit ranges from 0 to 90 degrees.
2D
Sprite sheet
The card lays out the animation clip from several directions, one row per direction and one cell per frame.
The card lays out a sprite sheet of the chosen animation clip, seen from several directions, with one row per direction and one cell per frame. A line shows the sheet's size in pixels and whether the clip loops or plays once. Every slider returns to its default on a double-click; the card's Reset button restores every default.
4Renders the sheet from four directions.
8Renders the sheet from eight directions.
16Renders the sheet from sixteen directions.
Lock anglesWhen on, the 2D view turns only to the sheet's directions.
The cells stay exactly as set whatever the view does.
Scene light and effectsWhen on, the cells are lit as the view is, with its effects.
Turning it off gives plain sprites.
TiltSets the camera's tilt for every cell, from 0 to 90 degrees.
SideSide on view.
2:12:1 pixel art isometric view.
IsoTrue isometric view.
TopStraight down view.
FramesSets how many frames of the clip each direction has.
The range is 2 to 24, with a default of 8.
Animate keysWhen on, the frames follow the animation keys.
CellSets the size of each cell in pixels.
The range is 64 to 2048 pixels, with a default of 256.
PaddingSets the clear pixels between the figure and its cell's edges.
The range is 0 to 64 pixels, with a default of 2.
Top and bottomAdds a view from straight above and one from straight below.
Parallel (orthographic)When on, the cells are drawn without perspective, as 2D games expect.
Transparent backgroundWhen on, the cells have a transparent background and no floor.
The cells sit on the game's own ground.
Start at the model's frontWhen on, the first row faces the model's front exactly.
Cells in the paneThe view shows the cells as they will be written.
2D
Pixel look
Renders the model as pixel art with a limited colour palette.
The viewer draws the model at a low resolution with crisp square pixels. The look works on its own or together with the Cartoon look. Settings are kept with the viewer's configuration and in saved setups. Each slider returns to its default on a double-click, and the card's Reset button restores every default.
Pixel lookTurns the pixel art look on.
HeightSets the picture's height in art pixels, from 16 to 256.
ModelA palette taken from the model's own colours, with as many colours as the Colours slider sets.
PICO-8The 16-colour PICO-8 palette by Lexaloffle.
Endesga 32The 32-colour Endesga 32 palette by ENDESGA.
ColoursSets how many colours the Model palette holds, from 2 to 64.
DitherBlends between palette colours with a regular pattern of pixels for smoother gradients.
OutlineA dark outline of pixels around the model's silhouette.
2D
Maps
The card chooses extra maps written beside the colour sheet, cell for cell, for lighting and effects in a 2D engine.
Maps are additional textures written alongside the colour sheet, one per cell, for lighting and effects in a 2D game engine. None are chosen by default.
NormalWrites the surface direction of each pixel for 2D lighting.
The normal is recorded in the camera's frame.
DepthWrites how far each pixel is from the camera.
OcclusionWrites the ambient occlusion that shading uses.
This is the darkening in creases.
IDWrites a flat colour per material for picking out parts.
The colour is the same in every cell.
2D
Export
The card writes the sheet, its maps and the data files game engines and tools read to cut it into frames.
The export writes the sprite sheet, any chosen maps, and data files that game engines and tools use to cut the sheet into individual frames.
GodotWrites the data file Godot reads alongside the sheet.
TexturePackerWrites the data file TexturePacker reads alongside the sheet.
AsepriteWrites the data file Aseprite reads alongside the sheet.
GameMakerWrites the data file GameMaker reads alongside the sheet.
Export sheetWrites the sheet, the chosen maps and the chosen data files.
While the export runs, this button reads "Stop export" and pressing it stops.
Open the folderOpens the folder the export wrote.
This link appears after an export finishes.
Image viewer
Image tone
Sets how the picture's range of brightness becomes what the screen shows.
The 3D view's Tone card works on the same tone mapper, so a picture and a model can be graded alike. The Reset button restores every default; sliders return to their default on a double-click.
ExposureBrightens or darkens the picture in photographic stops.
Range -5 to +5, default 0.
GammaSets the display's transfer curve.
Default 2.2; 1.0 for a display that applies its own.
LinearOperator: brightness as it is, clipped at white.
ReinhardOperator: rolls bright values off smoothly towards white.
ACESOperator: the ACES filmic curve used in film production.
The default operator.
FilmicOperator: the Hable filmic curve with a soft toe and shoulder.
ReadoutShows the pixel under the pointer in a line under the toolbar.
It appears on screen only and stays out of saved pictures. On by default.
TooltipsShows a tooltip when the pointer rests on a control.
Available here and in the 3D viewer; the same setting as the switch on the Model info card. On by default.
Image viewer
Channels
Chooses which channel of the picture is shown.
A source section appears above these controls when the file offers more than one choice of what feeds the colour.
RGBShows the full-colour picture.
This is the default.
RShows the red channel alone in grey.
GShows the green channel alone in grey.
BShows the blue channel alone in grey.
AShows the alpha transparency channel in grey.
LumShows the luminance, the perceived brightness, in grey.
Image viewer
Alpha
Shows how the picture stores its transparency.
The card displays edge pixel counts and how many will show as a fringe. The Behind section chooses what shows through where the picture is clear.
Alpha onlyShows the alpha channel alone.
Read as premultipliedReads the colour as already multiplied by alpha.
Mark fringesMarks the edge pixels that will show as a fringe.
CheckerShows a checkerboard through the clear parts.
BlackShows black through the clear parts.
WhiteShows white through the clear parts.
GreyShows grey through the clear parts.
Image viewer
Pixels
Set how enlarged pictures are drawn and at what factor they are saved.
When a pixel art picture is shown larger, the viewer draws it using one of three enlargement methods. A save enlarges the picture by the chosen factor.
NearestEach pixel grows into a sharp square block.
Scale2xAn enlarger made for pixel art that smooths diagonal edges while keeping the pixel look.
xBRAn enlarger made for pixel art that rounds curves and slopes more smoothly still.
1xThe picture is saved at its original size.
2xThe picture is saved at twice the original size.
3xThe picture is saved at three times the original size.
4xThe picture is saved at four times the original size.
Image viewer
Region
Selects the region that a save writes.
Dragging a rectangle over the picture selects the region. The Selection line shows its size, and after saving, the card names where the file went.
Whole imageSelects the whole picture.
ClearRemoves the selection.
With no selection, a save writes the whole picture.
Image viewer
Frames
Plays an animated picture or a sprite sheet.
The card contains the playback transport, the file's animation names, and a grid to divide sprite sheets when the file carries no frame description.
BackSteps one frame back.
PausePauses or resumes playback.
NextSteps one frame forward.
LoopPlays the frames round and round.
Onion skinShows the frames either side faintly over the current one.
SpeedSets the playback speed from 0.25x to 4x.
ColumnsSets how many columns the sheet is cut into, from 1 to 64.
RowsSets how many rows the sheet is cut into, from 1 to 64.
Image viewer
Mips
The smaller copies of a picture made for display at smaller sizes: which to view and how to average them.
A picture shown at smaller sizes is made into smaller copies, each half the previous size. The card shows which copy to display, the averaging method, the size and detail lost from each, and how linear and sRGB averaging differ.
0The full-size picture.
Numbered levels from 1 are each half the previous size; the list shows as many as the picture has.
Linear lightThe levels are averaged in linear light, as light adds up physically.
sRGBThe levels are averaged on the stored sRGB values.
Image viewer
Use this HDRI
Add this picture to the environment gallery so it can light 3D renders.
The card puts the picture into the environment gallery. A line shows whether it is already in the gallery.
Use this HDRICopies the picture into the environment gallery.
Show folderOpens the gallery folder.
Image viewer
Brightest region
Finds the brightest region of an HDR picture and reads out its direction, brightness and size.
The card finds the brightest region, usually the sun, and shows its direction in the sky, peak luminance, size and what share of the picture's light it produces. When the picture's projection is unknown, the direction reading explains why.
Image viewer
Probes
Three balls lit by the picture as an environment to judge its light for 3D renders.
The card renders three balls lit by the picture: one chrome, one 18% grey, and one matte. The render starts when the card opens, so the picture's light can be judged before it lights a 3D model.
Image viewer
Analyse
Four views of the picture: histogram, false colour, clipping and brightness positioning.
The card shows a histogram from dark through 18% grey to blown highlights. False colour paints the picture in the same colour scale. Readouts show the scene's brightness, dynamic range, clipping at the bright and dark ends, and how the picture sits relative to middle grey.
False colourPaints the picture in the histogram's colour scale so every brightness level reads at a glance.
Image viewer
Image sections
Opens the list of sections available in the image viewer.
The section chip at the left end of the toolbar names the current section. Pressing it opens this list. The cross on the chip leaves the section.
BrowseShows the picture and the everyday tools.
LightShows what an HDR picture will do to a render as an environment.
The section displays the histogram and false colour, the brightest region, probe balls lit by it, and a button to add it to the environment gallery.
The toolbar
Sections
The section chip at the left of the toolbar opens a list of specialized tool groups for different kinds of work.
The section chip at the left of the toolbar names the section the viewer is in, and pressing it opens the list: Print, Rigging, Animation, 2D and Gaussian Splat. A section shows its own tools plus undo, redo, the camera tools, reset view, reset scene, the floor and grid switches, the scene list and Save scene. Every other tool is one press away in the More menu at the end of the toolbar, and a switch that is on, such as free camera, stays on the toolbar so you can turn it off. The cross on the chip leaves the section and brings every tool back. The viewer remembers the section for each kind of file, and a section a file has no use for appears greyed with the reason beside it.
PrintMeasure the model's size and whether it fits a printer's build volume.
The tools for 3D printing show the model's dimensions in millimetres and mark where supports will be needed.
RiggingFit a skeleton to the model and pose it.
AnimationMake animation keys on the timeline.
2DExport the model as sprite sheets with their maps.
The model becomes sprites: sheets, their textures and their export settings.
Gaussian SplatWalk through a captured scene and jump to its saved places.
A capture opens in this section. It is a photographed scene made of splats. Named views let you jump between places inside it.
The toolbar
More controls
The toolbar's last button opens a card that lists every control without room at the pane's current width.
The controls are grouped under the same headings the toolbar uses. Each row works the same way as its toolbar button does. A row that opens a card shows a chevron. When the list is longer than the card, it splits into pages.
More controlsGo to the next page of the list.
This row sits at the foot of the first page.
Back to the first pageReturn to the first page of the list.
This row sits at the foot of the last page.
The toolbar
Documentation
Opens the Heimdall3D manual in your web browser.
The Documentation button, a book icon at the top right of the viewer, opens the manual at heimdall3d.com/docs. The manual has a searchable page for every card with its controls, and the viewer's tooltips use the same words.
Alerts
This installation is incomplete - rendering on the CPU, without textures
Some rendering files are missing from the installation folder.
Some of Heimdall3D's rendering files are not on your computer. Pictures are drawn by the processor in a simpler form without textures and several effects. Installing Heimdall3D again will restore the files.
Alerts
Windows blocks previews of downloaded files - click to clear the mark
Downloaded files are marked by Windows and skipped by the preview pane.
Windows marks every file downloaded from the internet. The Explorer preview pane leaves a marked file unpreviewed. Thumbnails and this viewer window show the file as usual. The card names the file and can clear its mark, which is the same as ticking Unblock in the file's Properties.
Unblock this fileClears the downloaded mark so the preview pane shows the file.
Alerts
This picture was drawn without some of what the settings asked for
The graphics card renderer was unavailable.
The picture was drawn by the processor renderer, which leaves out some of what the settings ask for. The card's title reads SIMPLIFIED RENDER and lists what the picture was drawn without and why the graphics card renderer was unavailable. The picture stays as it is and the button appears quietly.
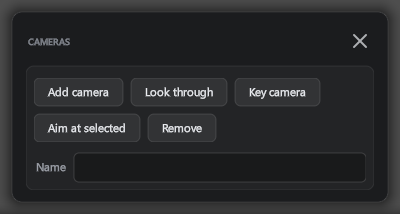
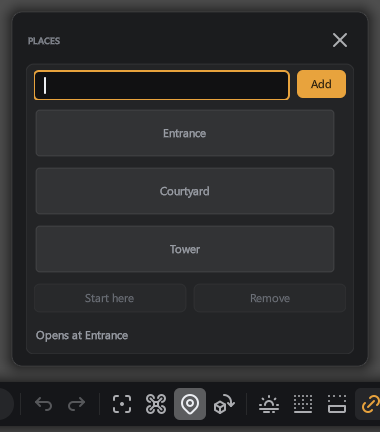
 Places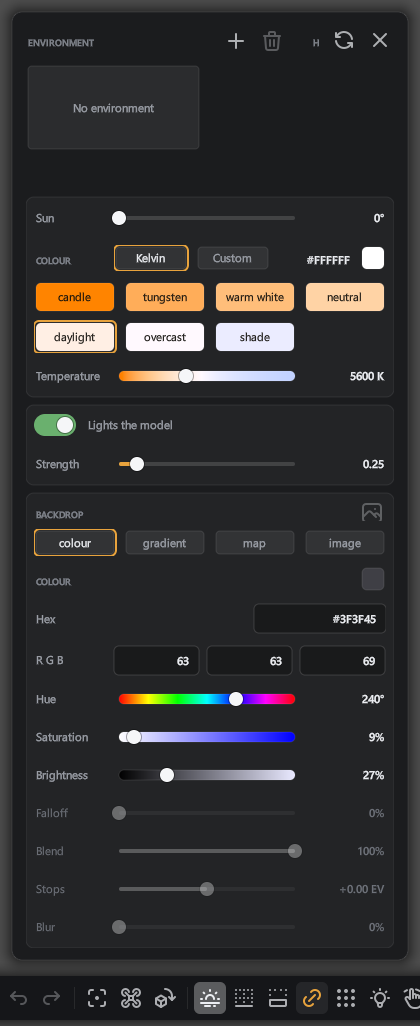
 Environment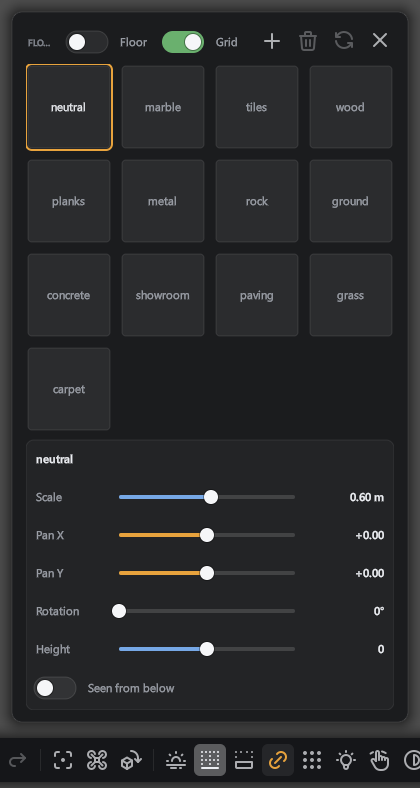
 Floor
Floor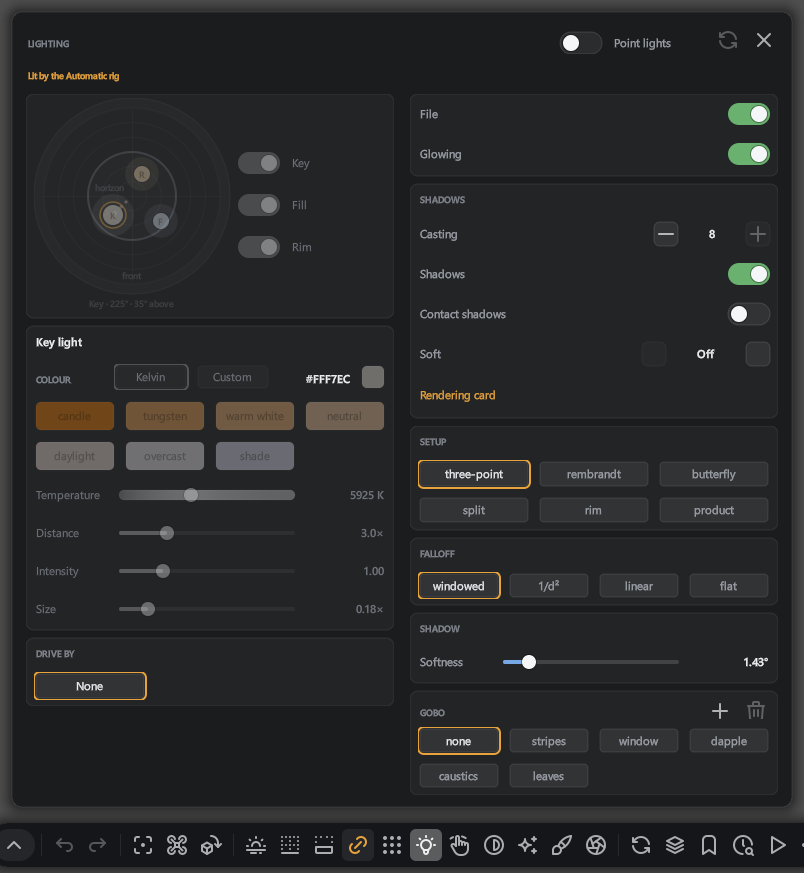
 Lighting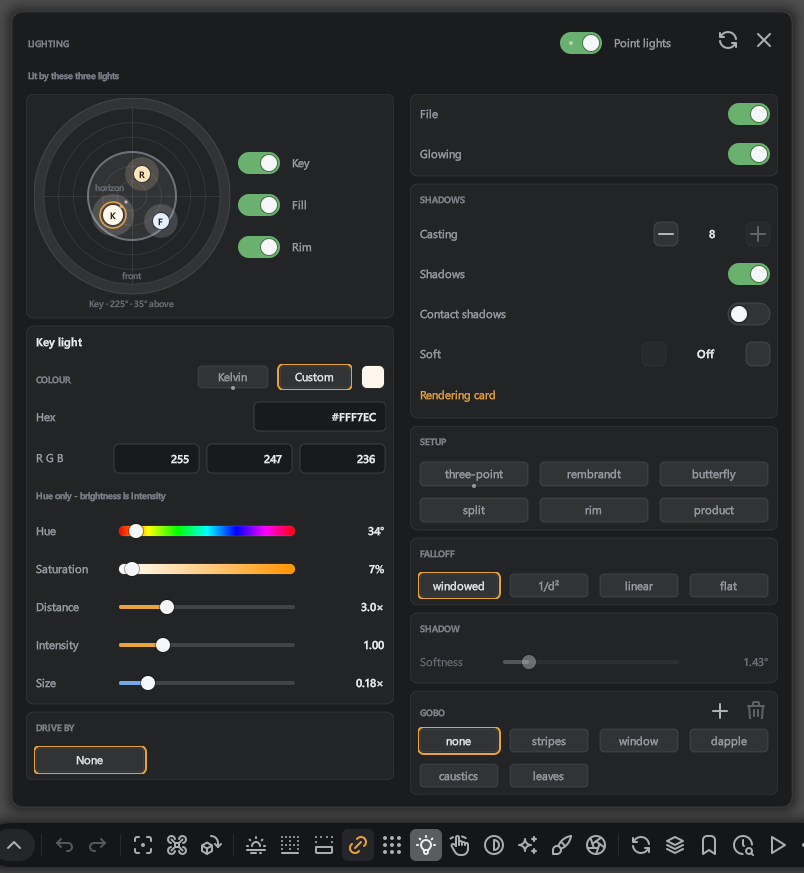
 Colour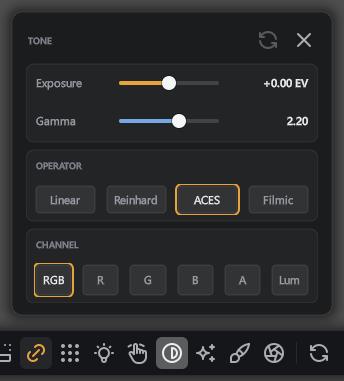
 Tone
Tone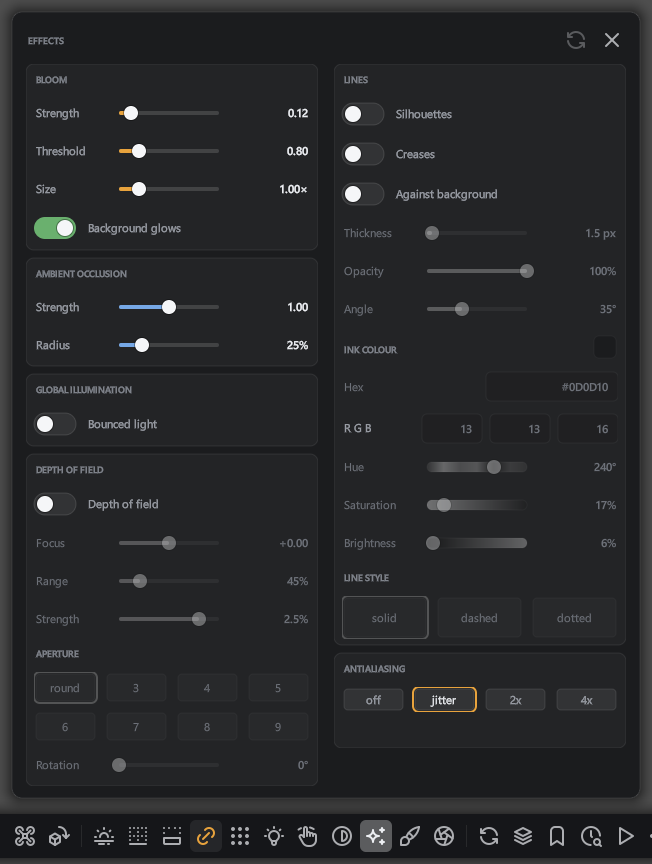
 Effects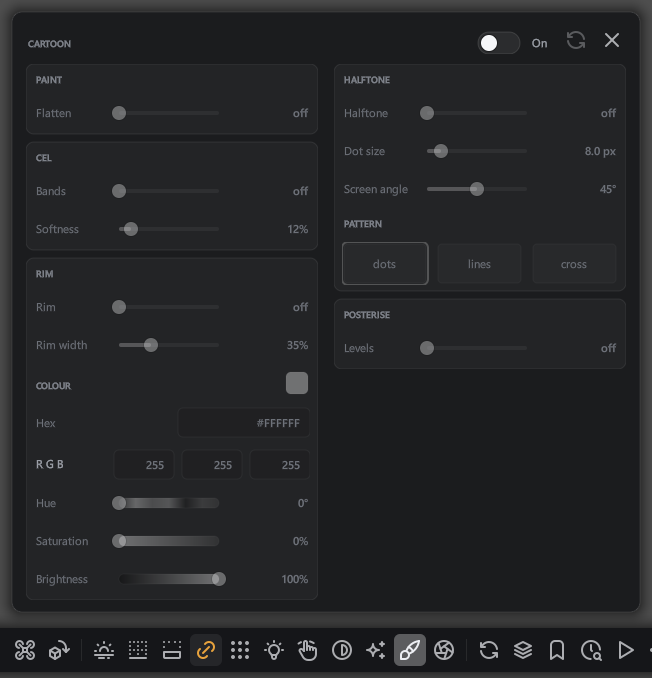
 Cartoon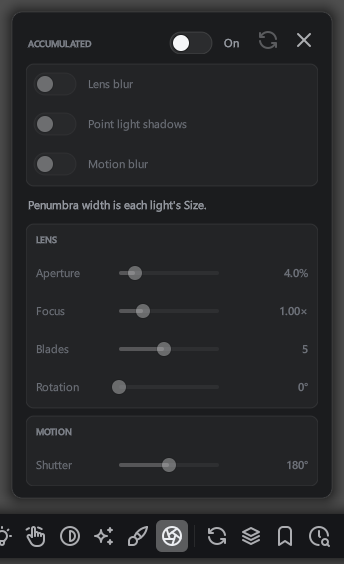
 Accumulated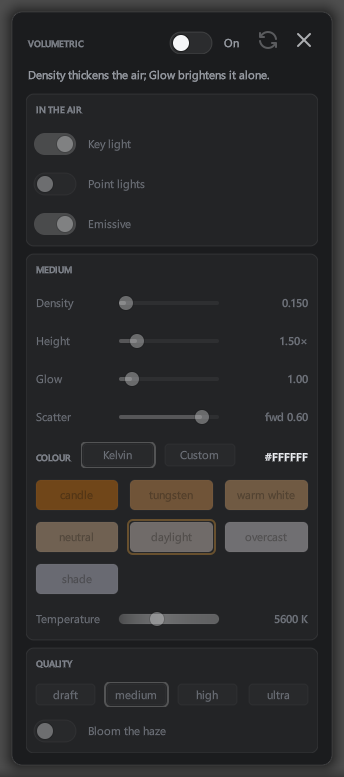
 Volumetric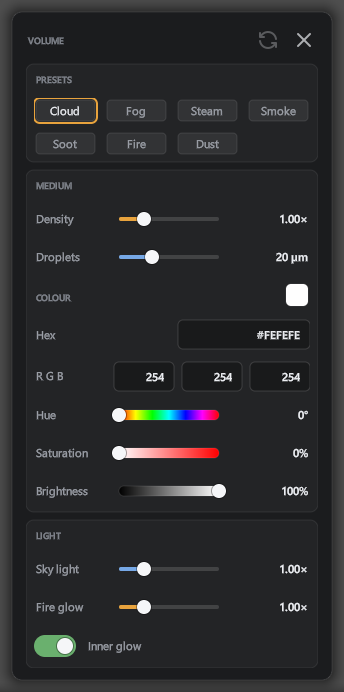
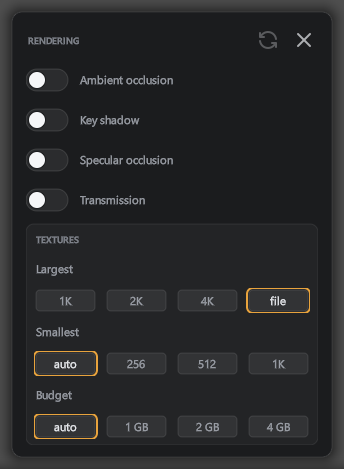
 Traced effects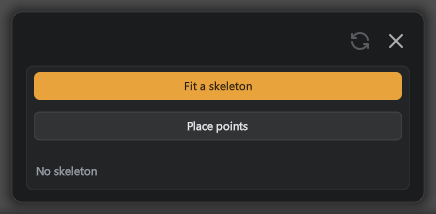
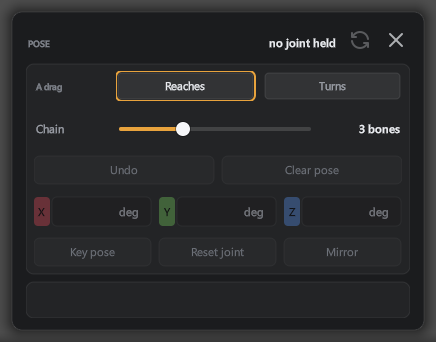
 Pose a limb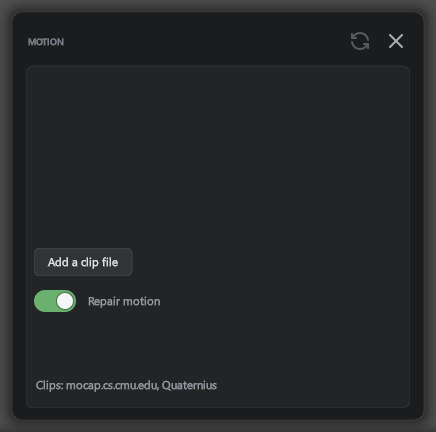
 Motion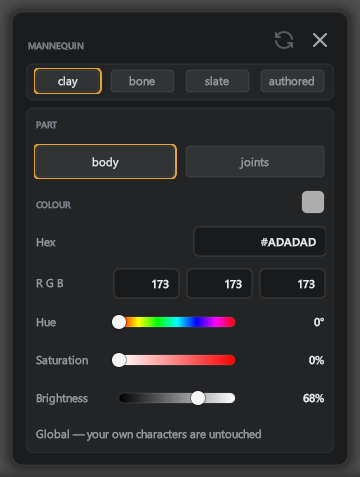
 Mannequin colours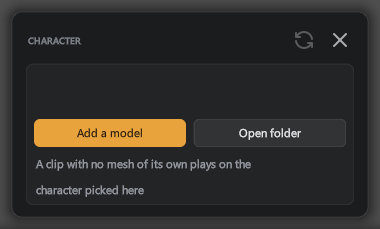
 Character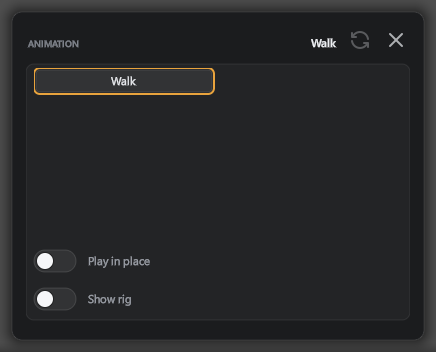
 Animation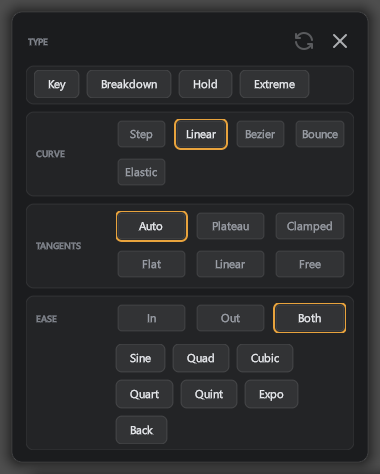
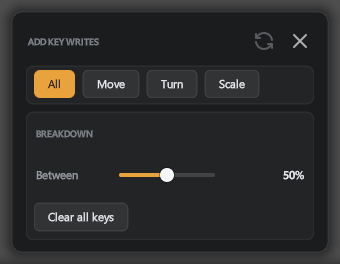
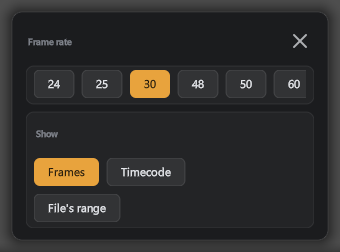
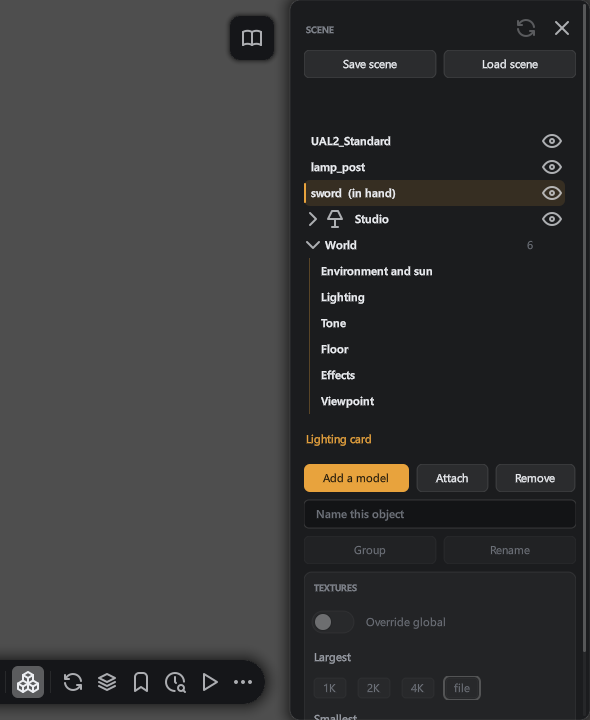
 Scene
Scene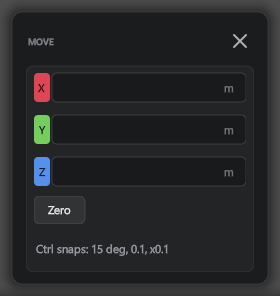
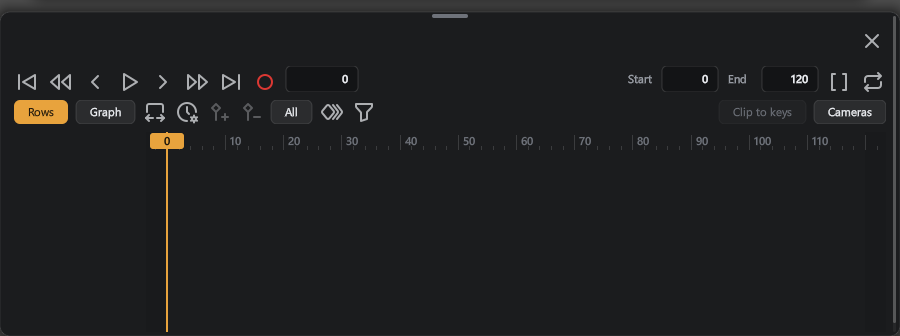
 Timeline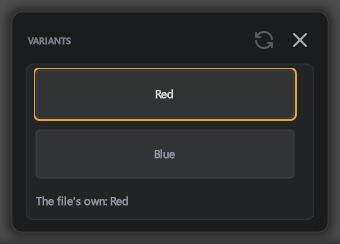
 Material variants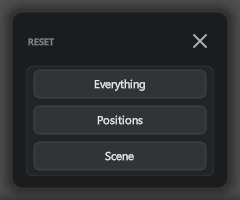
 Reset
Reset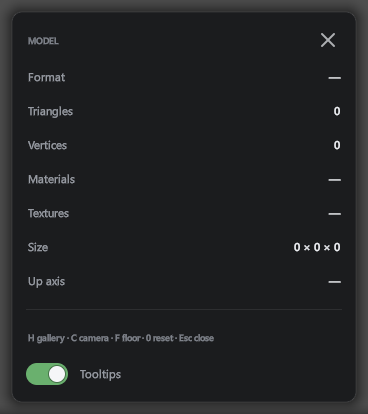
 Model info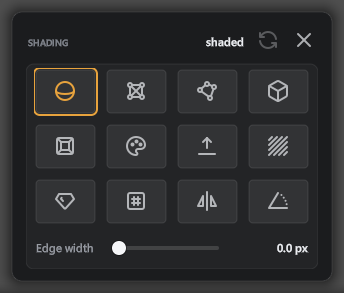
 Shading mode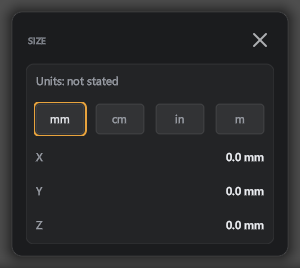
 How big this is, in millimetres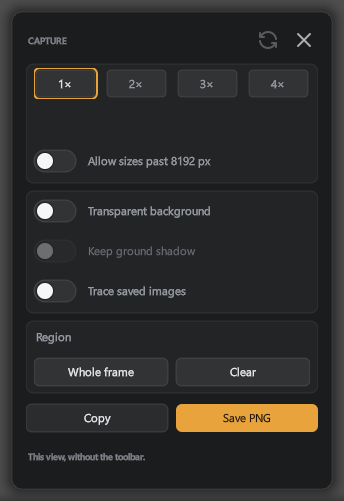
 Capture a still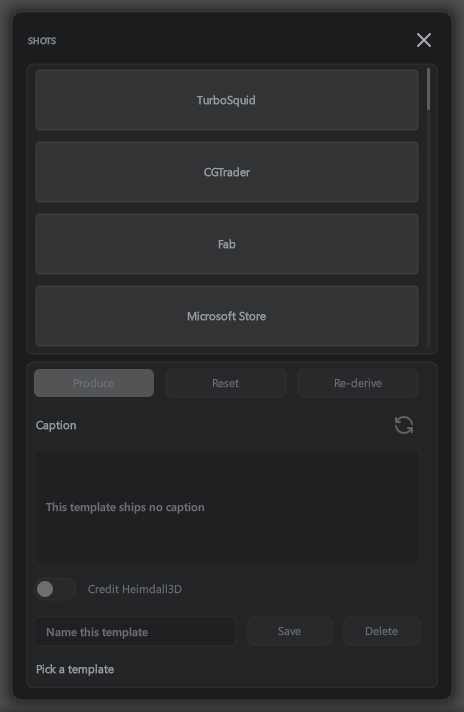
 Shot templates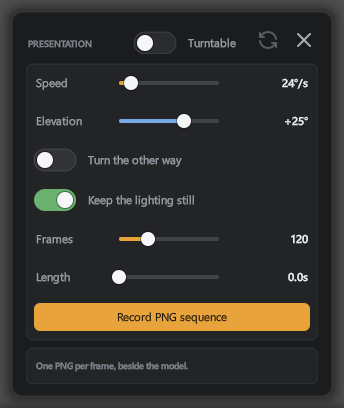
 Presentation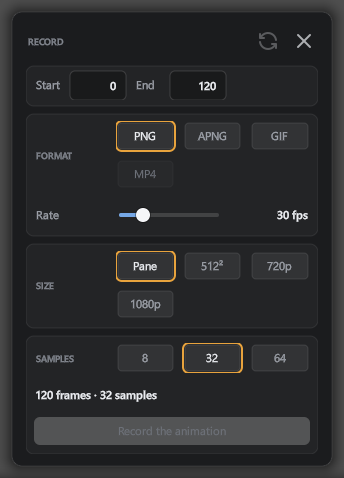
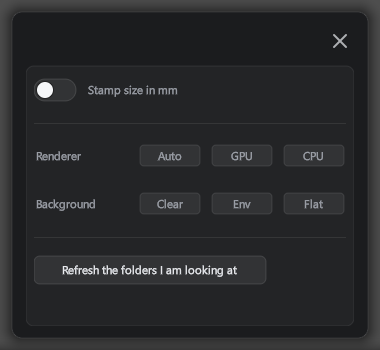
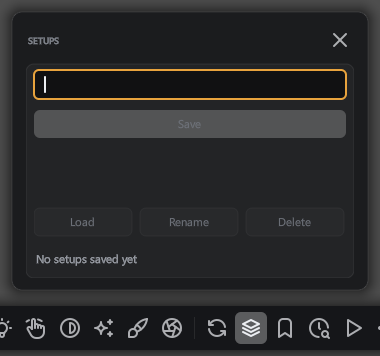
 Named setups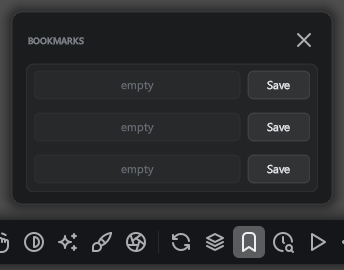
 Bookmarks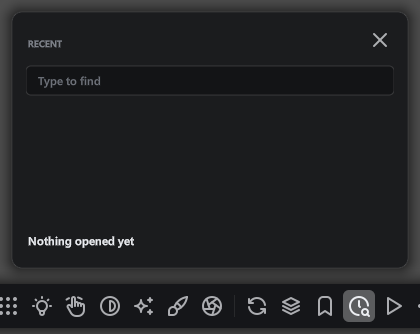
 Recently opened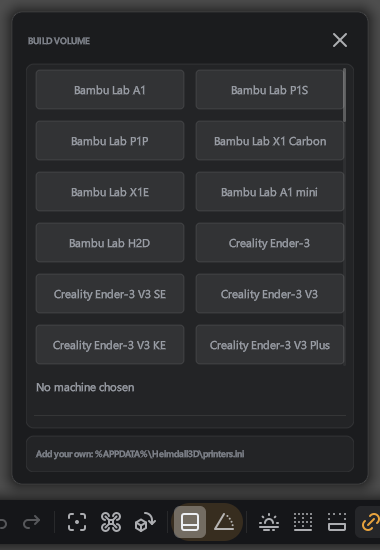
 Will it fit the machine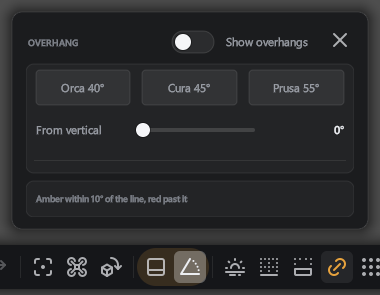
 Where supports will be needed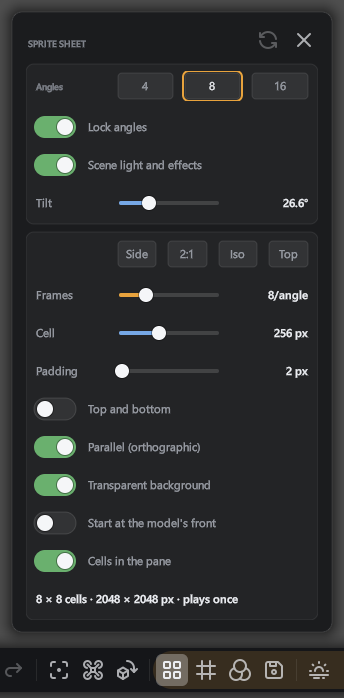
 Sprite sheet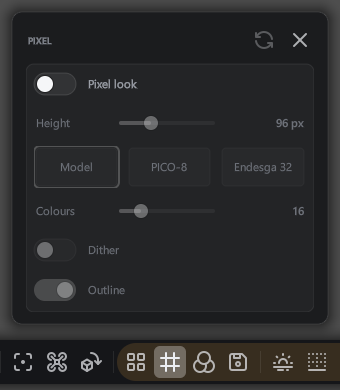
 Pixel look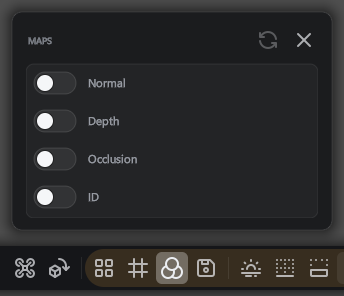
 Maps
Maps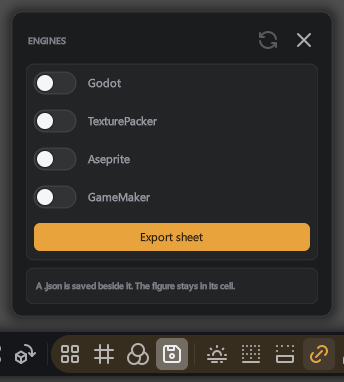
 Export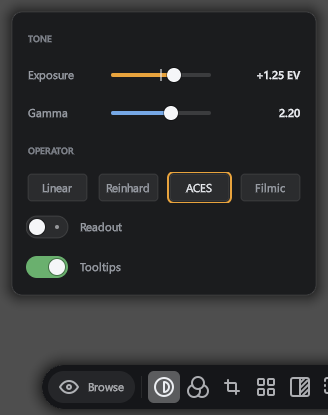
 Image tone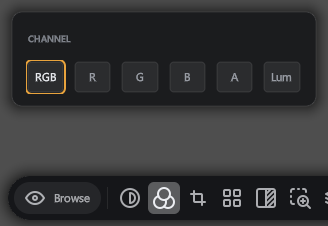
 Channels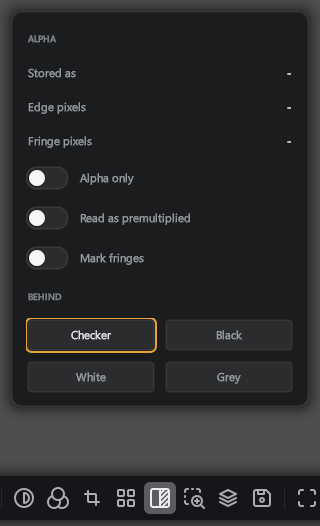
 Alpha
Alpha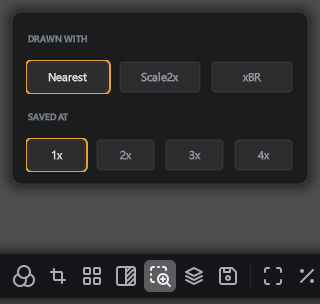
 Pixels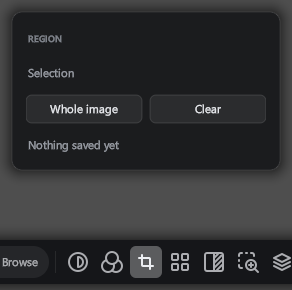
 Region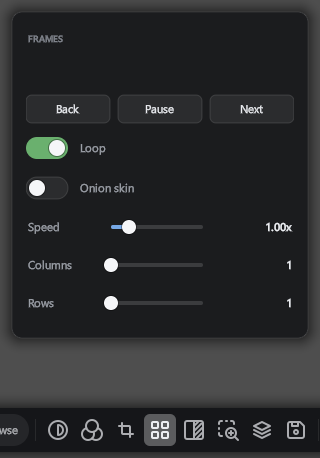
 Frames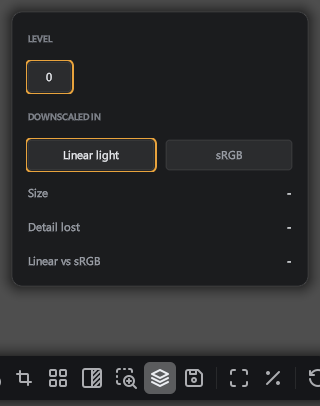
 Mips
Mips
 Use this HDRI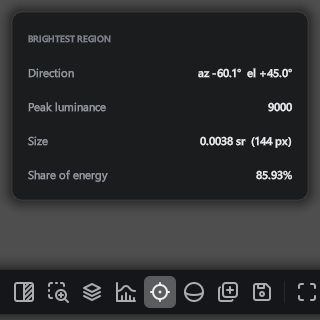
 Brightest region
 Probes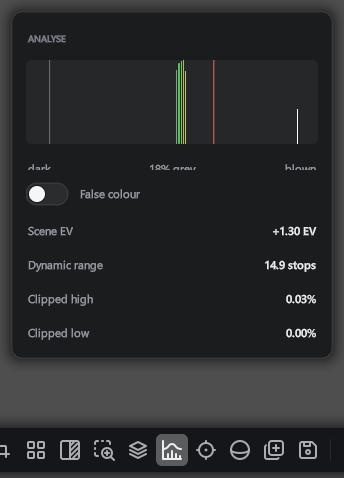
 Analyse
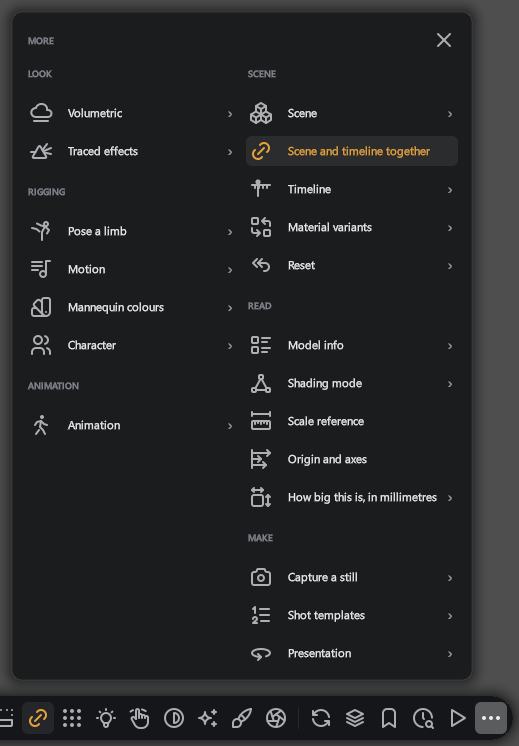
 More controls
 This installation is incomplete - rendering on the CPU, without textures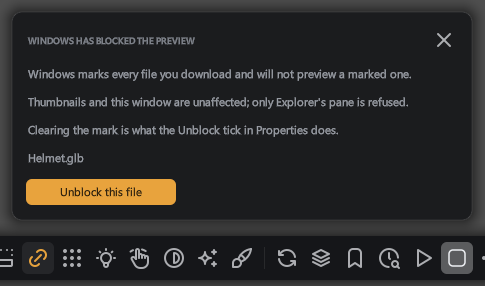
 Windows blocks previews of downloaded files - click to clear the mark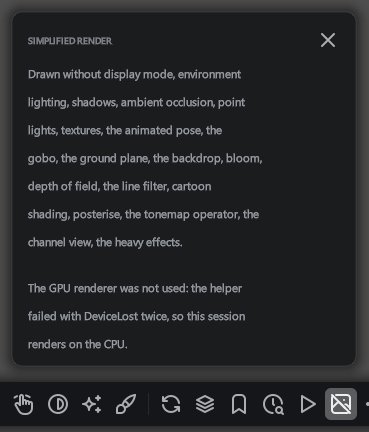
 This picture was drawn without some of what the settings asked for