Version 1.0.15 is available for Windows. Looking at your files needs no key and does not expire. Download it.
Motion capture
Every clip in a folder gets a thumbnail of the character posed. Open a clip and it plays.
Each clip is retargeted onto a rigged mannequin and plays at its authored frame rate. Most motion capture files hold animation and no mesh; the mannequin supplies the body.
Node animation plays too, so a door or a machine moves without a skeleton.
Cartoon shading, outlines and depth of field are display settings. They apply while a clip plays, and combine with the environment and floor settings in the same pane.
Cartoon shading quantises the lighting into steps. The outline follows the silhouette as the pose changes. Both cover the floor as well as the model.
Depth of field samples a real aperture rather than blurring the finished frame. Focus is held as a fraction of the distance to the camera target, so a subject crossing the frame stays sharp. While a clip plays the sample count is what the machine can afford; paused, it climbs to 64.
Clips and playback
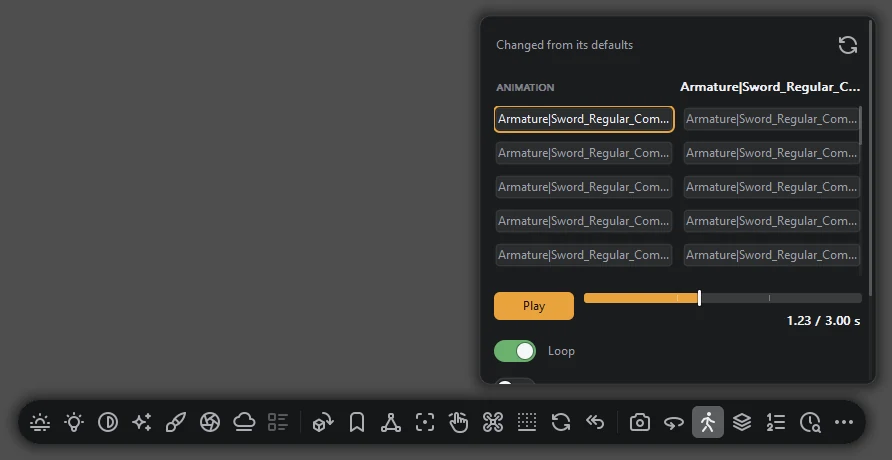
A file with several animations lists them in a grid. Pick one and the transport below the grid plays it.
The track beside the play button is a scrubber. Drag it to a frame and the pose holds there. Clips are sampled at 30 Hz. The grid scrolls, so a long list still fits in one card.
In place removes a clip's horizontal travel, so a walk cycle stays at the origin. Vertical movement is kept; a jump still leaves the ground. It lines up the cells of an eight-direction sprite set.
Skeleton draws the rig over the mesh, or on its own for a file with no mesh. Looping is on by default.
Sprite sheets
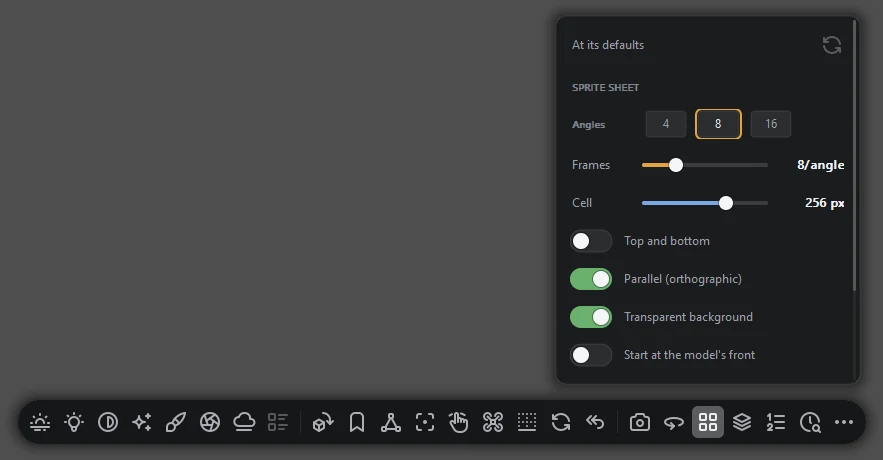
A clip exports as one PNG with a JSON sidecar. The sheet holds 4, 8 or 16 directions around the model, across the frames of the animation.
Cells are 64, 128, 256 or 512 px, at 2 to 24 frames per direction. The sheet size follows: 8 directions of 8 frames at 256 px is an 8 × 8 grid, 2048 px square. Cells are cut out on a transparent ground and rendered in parallel projection, so each sits on an engine's grid at the same scale.
The model must carry an animation. A static prop cannot be exported as a sheet yet.
The sidecar carries cell size, grid, frame rate, pivot, and the yaw of each row. Every cell is rendered about one shared origin, so the sprite does not jitter between frames.
Environment
The scene is lit by an HDR image wrapped around it, from the gallery or a file of your own.
Yaw turns the image around the model, which moves the highlights; the model and camera stay put. Intensity scales the image's contribution. Metals take their colour from the map, so changing the map changes the metal.
The backdrop is separate from the lighting: a flat colour, a gradient, the environment image, or a bitmap of yours. Changing the backdrop does not change the light. The environment can light the model and show nothing behind it.
The backdrop has its own blur, its own exposure in stops, and a blend against what is behind it.
Floor
A ground plane under the model. The model sits on it and casts a shadow onto it.
Floors reflect. The model is drawn a second time, mirrored through the floor plane, and blended in by the floor's roughness: smoother is sharper, rougher is blurred. It is a planar reflection, not a traced one, and costs one extra pass over the geometry.
A shadow catcher takes the shadow and the reflection but is not drawn itself. Use it for a capture with a transparent background.
Twelve materials: marble, tiles, wood, planks, concrete, paving, metal, rock, ground, grass, carpet and a plain showroom sweep. A grid can be drawn instead of a material.
Scale, offset and rotation place the material on the plane. Scale runs 0.1 to 8. Offset reaches a quarter of the plane either way on both axes. Rotation covers a full turn. A tile pattern can be sized against the model rather than the floor.
To add your own, drop a picture in the floors folder. It is turned into an albedo and a normal map the next time the card opens. The floor is identified by the picture's content, not its filename, so renaming it or adding another beside it does not change what a saved shot asks for. One picture gives roughness 0.6 and a flat normal; put a matching rough or normal map beside it to change that. The card states which maps it found.
Gobos
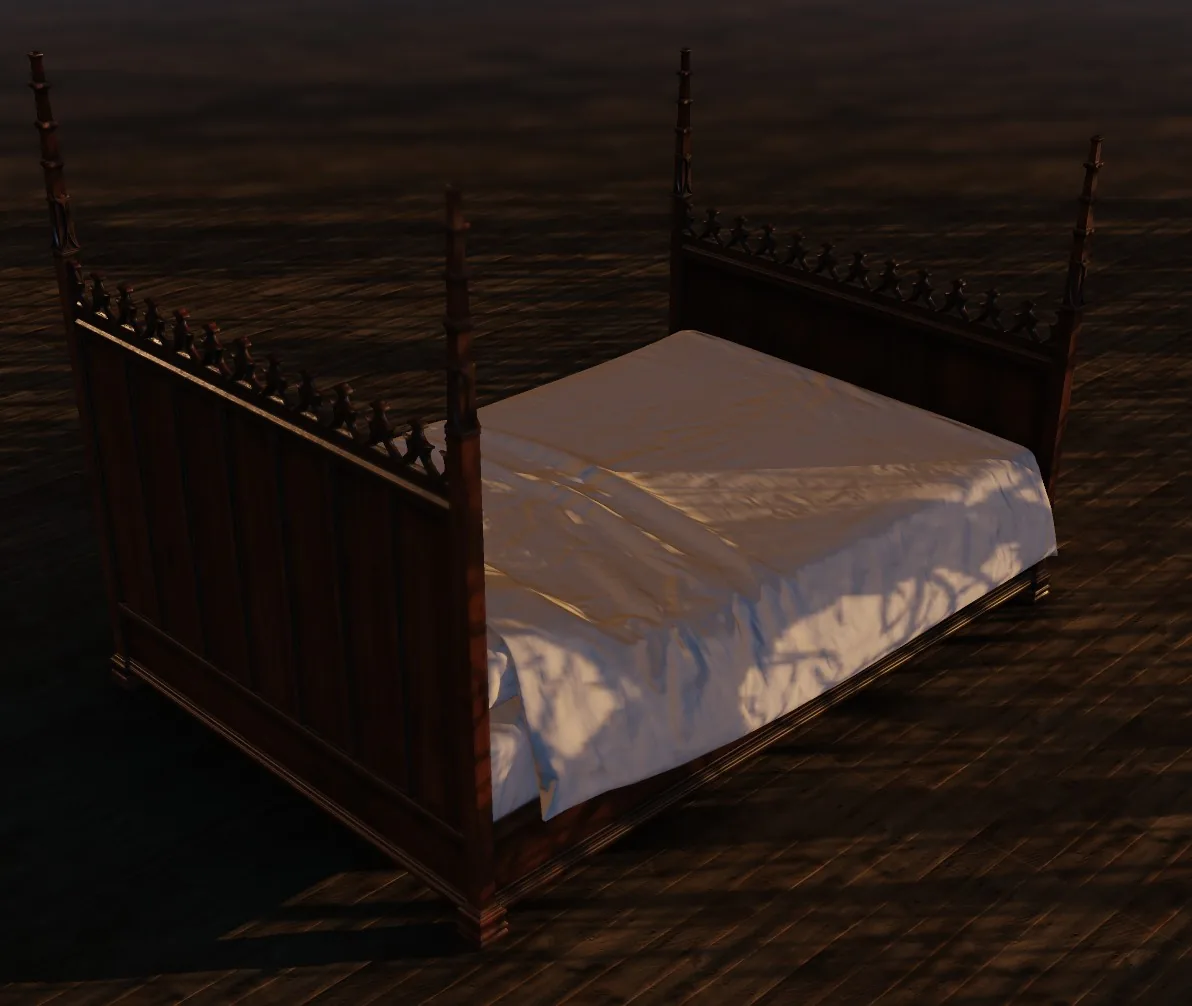
A shape cut into the key light, so the light arrives patterned: a window, a blind, foliage.
The image is projected from the key light's direction and multiplies what that light delivers. The pattern lands on the model and the floor and bends over the geometry it crosses. Scale, offset, rotation and softness place it.
Repeat sets how many times the image tiles; at 1 a window pattern is one window. A second switch sets what happens beyond the edge of the image: the light stops there or carries on unpatterned.
The library holds stripes, a window, dapple, a water ripple and leaves. Each is a picture used as a mask on the light, not a simulation. Your own image works the same way; it needs to be a pattern of light and shade.
Lights
Three point lights sit around the model: a key, a fill and a rim. Each is positioned separately.
Six setups place all three at once: three-point, Rembrandt, butterfly, split, rim and product, the standard photographic arrangements. Rembrandt puts the key high and to one side. Butterfly puts it square above the lens. Each setup is a starting point.
Each light takes a colour, picked directly or from a Kelvin preset from candle through tungsten and daylight to shade. Its size sets the shadow edge: a bigger source gives a wider, softer penumbra.
Falloff is windowed, inverse-square, linear or flat. Inverse-square is what real light does. Flat keeps a fill light from visibly falling off.
Emissive materials light the scene at a strength you set. A lit lamp shade throws light on what is near it. Coloured glass tints the light that passes through it.
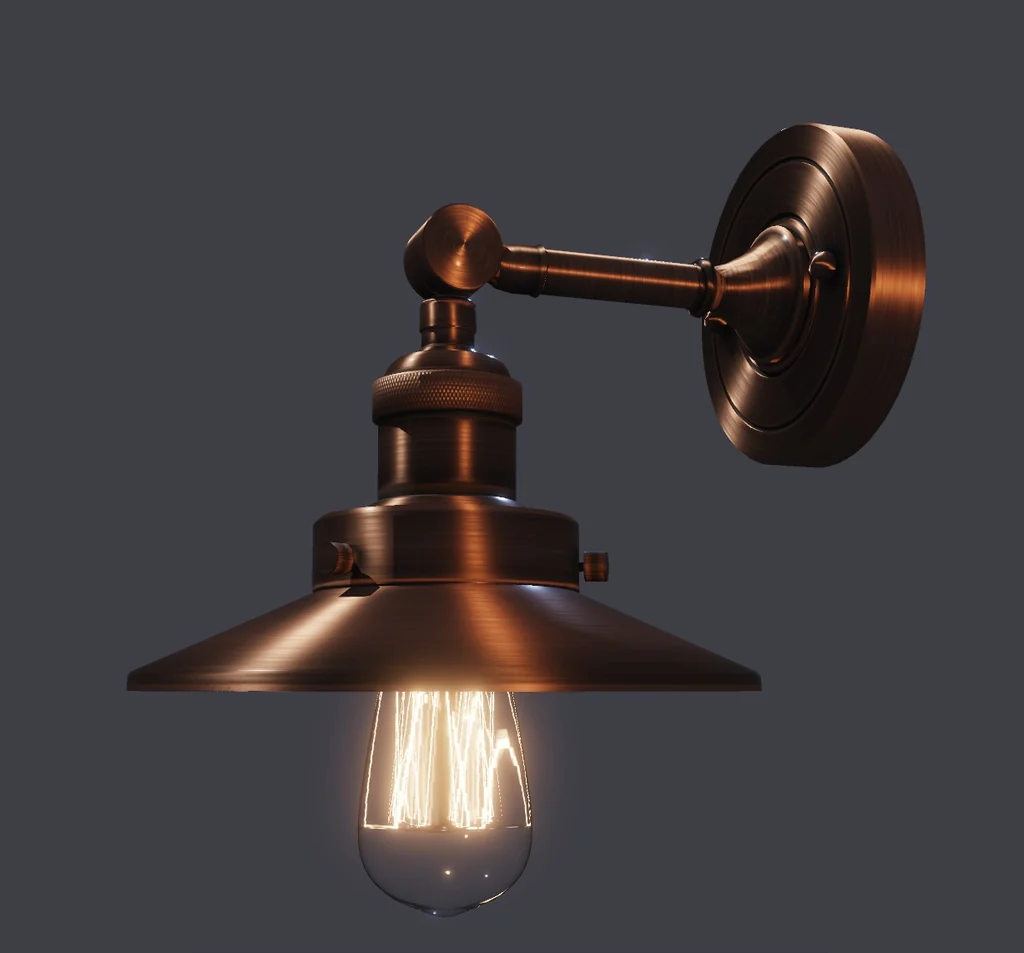
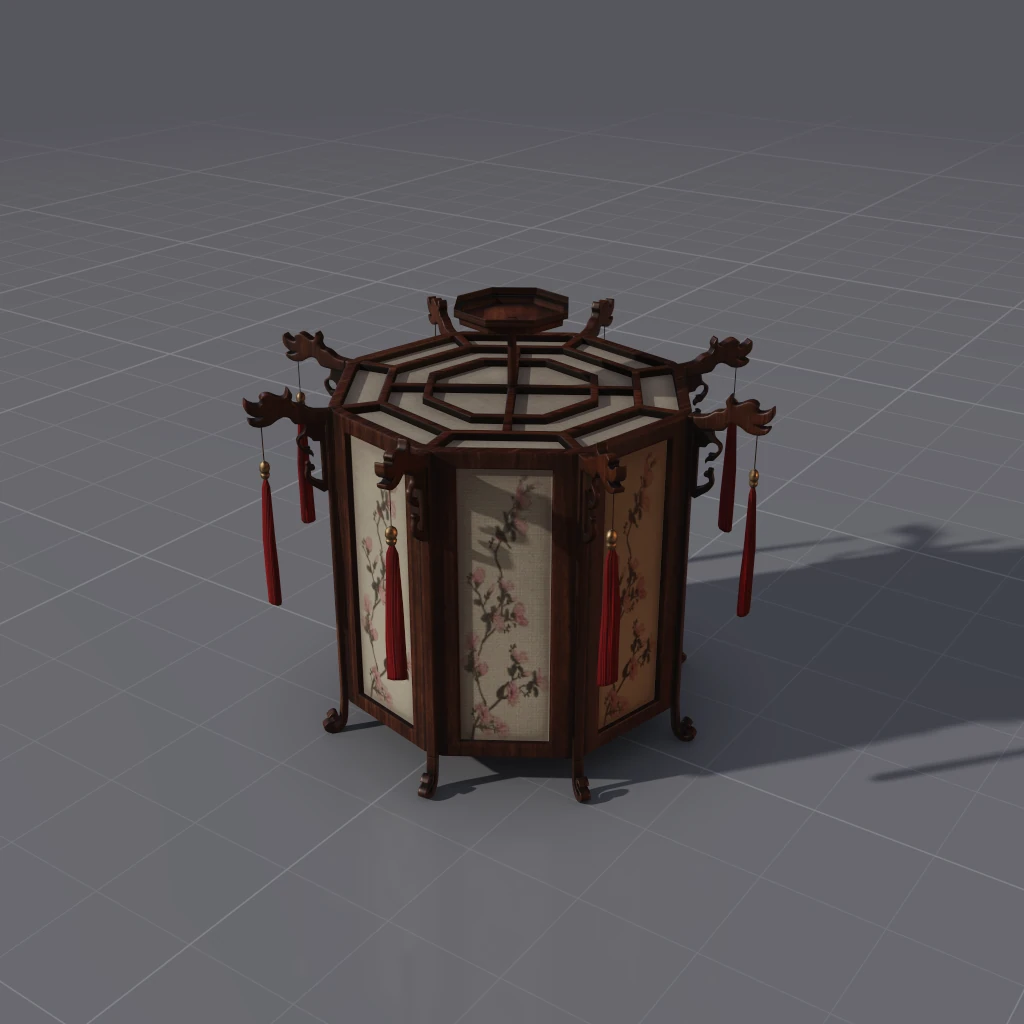
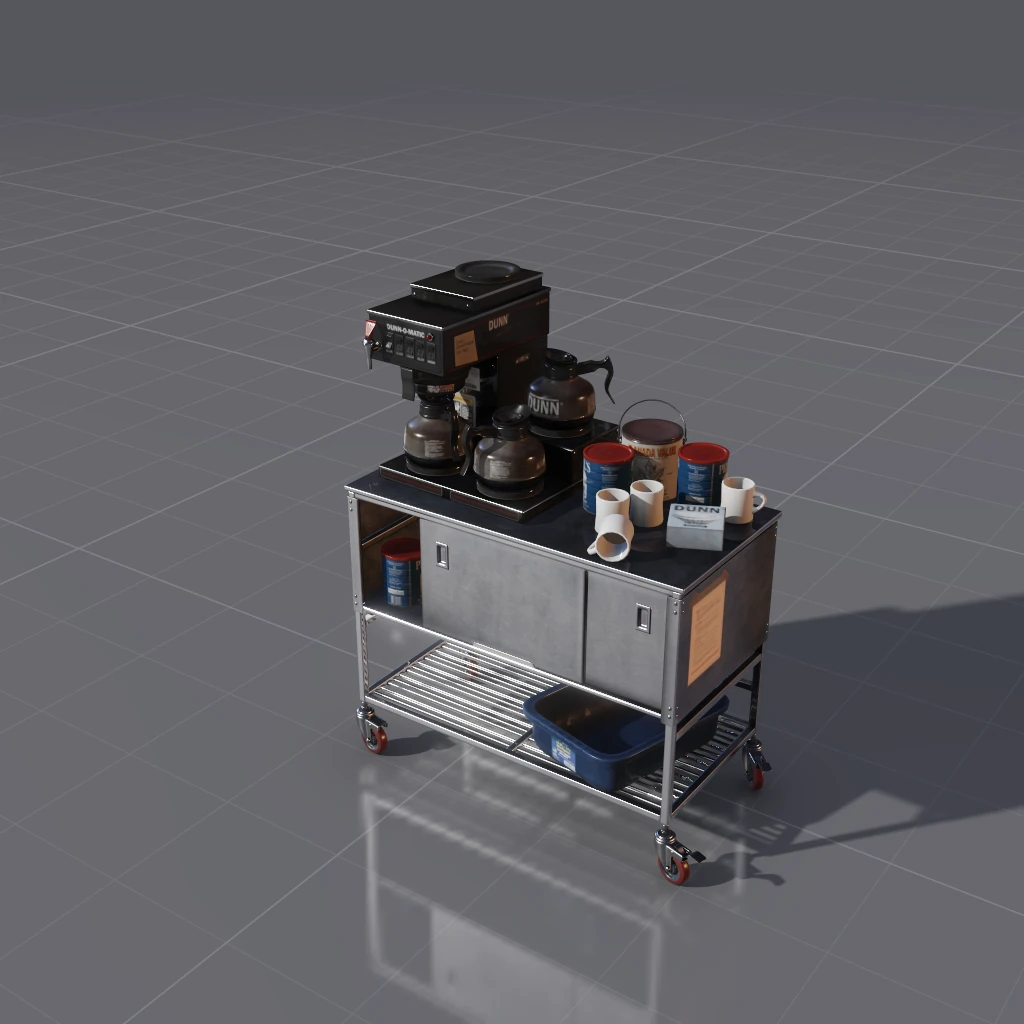
Model credits and licences for the models pictured on this page.
Placing lights
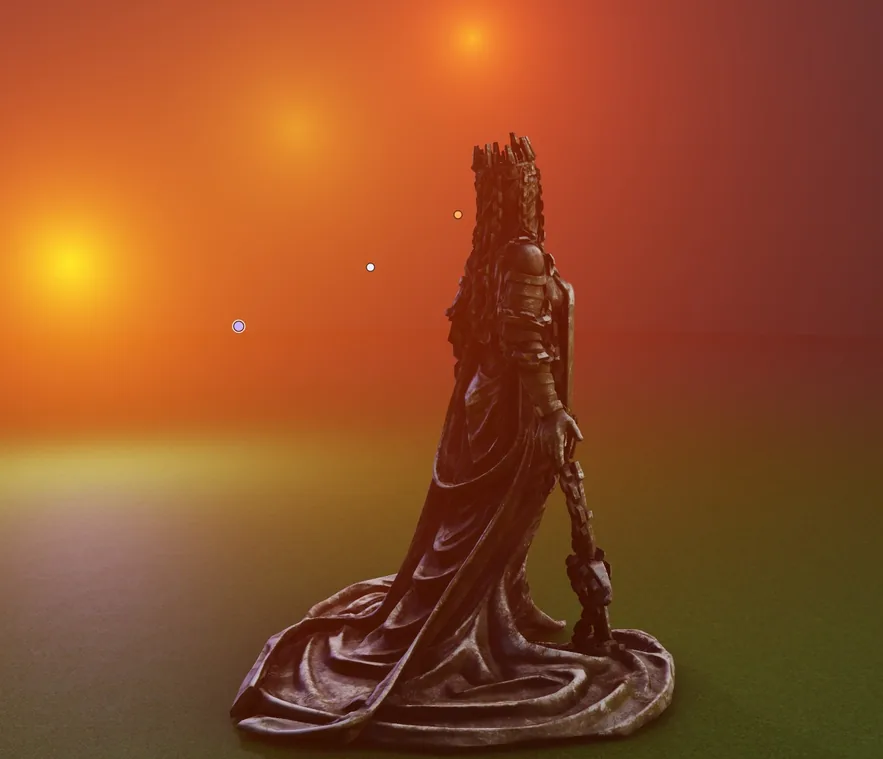
A point light stands in the scene at a place of its own. Orbit the camera and the light stays put, and so do the highlights and the shadow it makes.
Each light draws a soft glow where it stands and a small round handle in its own colour, beyond the model's silhouette. Drag the handle and the light swings around the model in that direction. Distance stays on the card, 1.1 to 8 times the model's radius.
Click a handle to select that light. The selected handle is ringed, and the card's colour, size and distance sliders edit that light. A light that is switched off keeps its handle, dimmed.
Size is the width of the emitter, 0.02 to 1 times the model's radius. Point lights add to the environment. The map goes on lighting the model beneath them.
The key light casts a shadow. Its shadow map is fitted to where the shadow lands on the floor, out to 8 times the model's radius, so a light set low throws a long shadow across the plane.
Volumetric light
Light made visible in the air between the source and the model: a beam through a window, haze low in a room, a glow around a lamp.
The renderer marches along the view ray, working out at each step how much light reaches that point and how much scatters towards the camera. Where a gobo blocks the key light, nothing is lit along that stretch, which turns a window pattern into separate shafts.
The key, the point lights and emissive materials each feed it on their own switch.
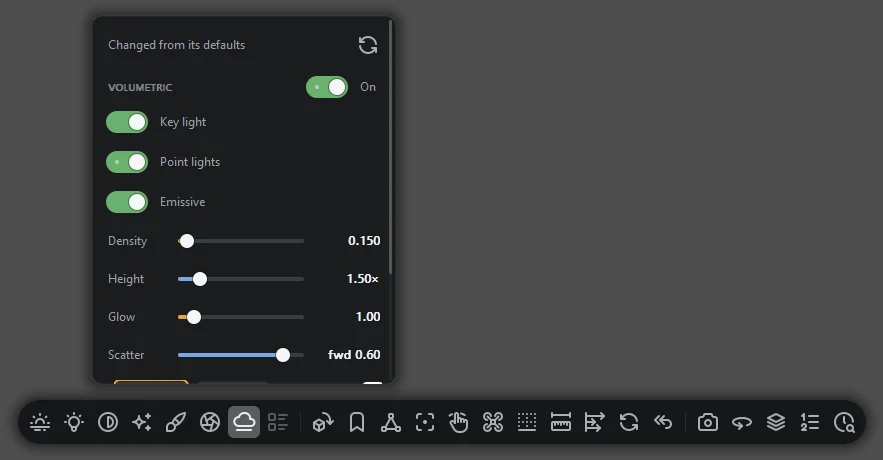
Density is how thick the medium is, as a multiple of the model's own size, so a 0.2 m earring and a 40 m building haze over the same fraction of the frame. 0.005 to 2, default 0.15.
Glow brightens the scattered light alone, without thickening the haze that dims the model behind it. 0 to 8, default 1.
Height is how far the medium reaches above the floor, in model heights. 0.1 to 8, default 1.5. At the top of the range the falloff switches off and the medium fills the scene evenly.
Scatter sets which way the light bounces, from −0.9 back towards the source to +0.9 forwards, default 0.6. Forward scattering makes a beam bright when viewed towards the light and faint across it. The range stops short of ±1, where the beam would collapse.
A colour tints the medium, set directly or from a Kelvin preset. It multiplies each light's own colour rather than replacing it.
Quality is the number of march steps: 32, 64, 128 or 256. More steps give a smoother beam, not a brighter one; too few and it bands. This is the one control here that costs time.
A separate switch lets the haze bloom, so a glowing lamp is not bloomed twice, once as the lamp and once as the air around it.
The march runs once per drawn frame, not once per accumulation sample, so it costs the same whether the picture is converging or not. The card is off by default.
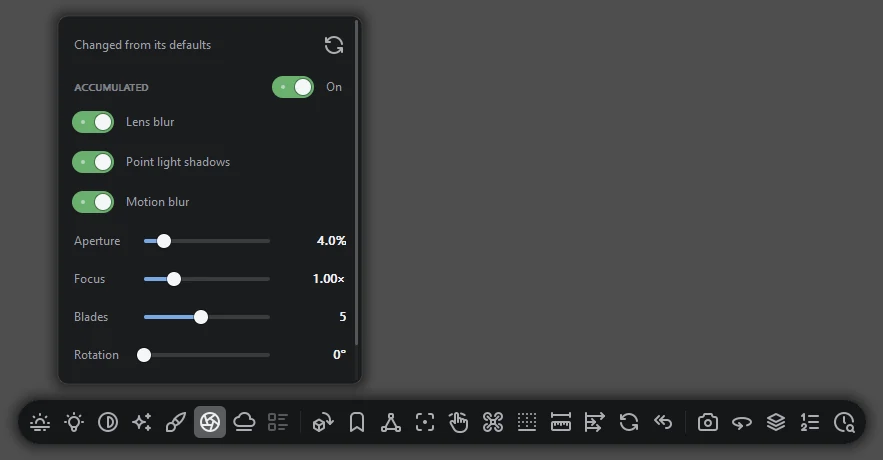
Lens blur, point-light shadows and motion blur
Three effects on one card, sharing one mechanism: each jitters something a little differently on every sample, and the results are averaged.
The lens jitter moves the sample point across a virtual aperture, so what is off the focal plane goes out of focus as a lens does it, not by a blur filter. The shadow jitter moves the sample across the area of a point light, giving a penumbra as wide as the light's Size. The motion jitter moves the sample in time along the animation.
Each is switched separately.
The aperture takes a blade count and a blade rotation, five blades by default. Below the minimum it is a circle and out-of-focus highlights are round; above it they take the straight-sided shape of an iris. Focus is set as a fraction of the distance from the camera to its target, so it stays on the subject when you move.
Motion blur is set as a shutter angle in degrees.
These three cost frame rate rather than pixels. A still pane climbs to 64 samples and the grain falls away as it goes. While you drag the model it renders at the sample count your machine has been measured to afford, so the effect is coarse in motion and resolves when you stop. Off by default.
Bloom, occlusion and outlines
Bloom. Light spilling from the brightest parts of the frame into what is beside them. Only pixels above a threshold contribute: an emissive shade or a specular highlight blooms, a white wall does not.
Ambient occlusion. Contact shadow in the creases, where a surface is partly enclosed by what is near it: a panel line, the gap under a foot, the inside of a helmet. On an open, convex object the difference is small.
Outlines. A line filter that inks the edges of the model. It reads depth and normals, not colour, so a line follows the shape and not the paintwork.
Three kinds of edge, each switched on its own: a silhouette, where depth jumps; a crease, where the surface direction turns sharply; a border, where the model meets the background. Lines are solid, dashed or dotted, at a thickness in output pixels.
The ink runs from black to white and has no hue. You set how dark the line is and how far it covers what is under it.
Lines are drawn into the frame before the post chain, so bloom, depth of field and the tonemap all see them.
Cartoon shading
The scene drawn as flat bands of colour instead of a continuous gradient.
Lighting is quantised into a set number of steps. A rim term lights the silhouette from behind. A halftone screen replaces the shading with dots at a size and angle you set. Posterise reduces the colours afterwards.
It applies to the model, the floor and the glass alike, so the whole frame is one drawing.
Outlines are white. Off by default.
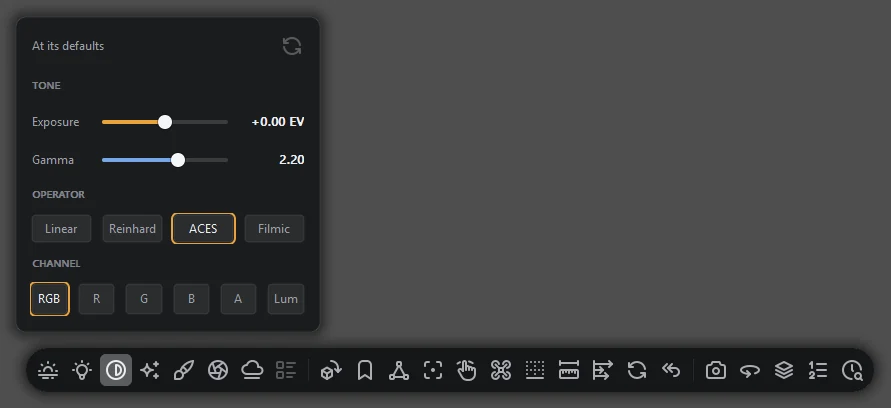
Exposure and tonemapping
These controls decide how the rendered light becomes pixels. They are present for 3D models and for HDR images.
Exposure scales the light before anything else. The tonemap operator then maps the result into display range: linear, Reinhard, ACES or filmic. The operator changes how the brightest parts roll off, and whether a highlight holds its colour as it clips or slides towards white. Gamma is applied last, 2.2 by default.
A channel view shows red, green, blue, alpha or luminance on its own.
The render is held in floating point up to this point, so these controls re-read the data rather than editing a finished image. Pulling exposure down recovers detail in a blown highlight.
Small detail
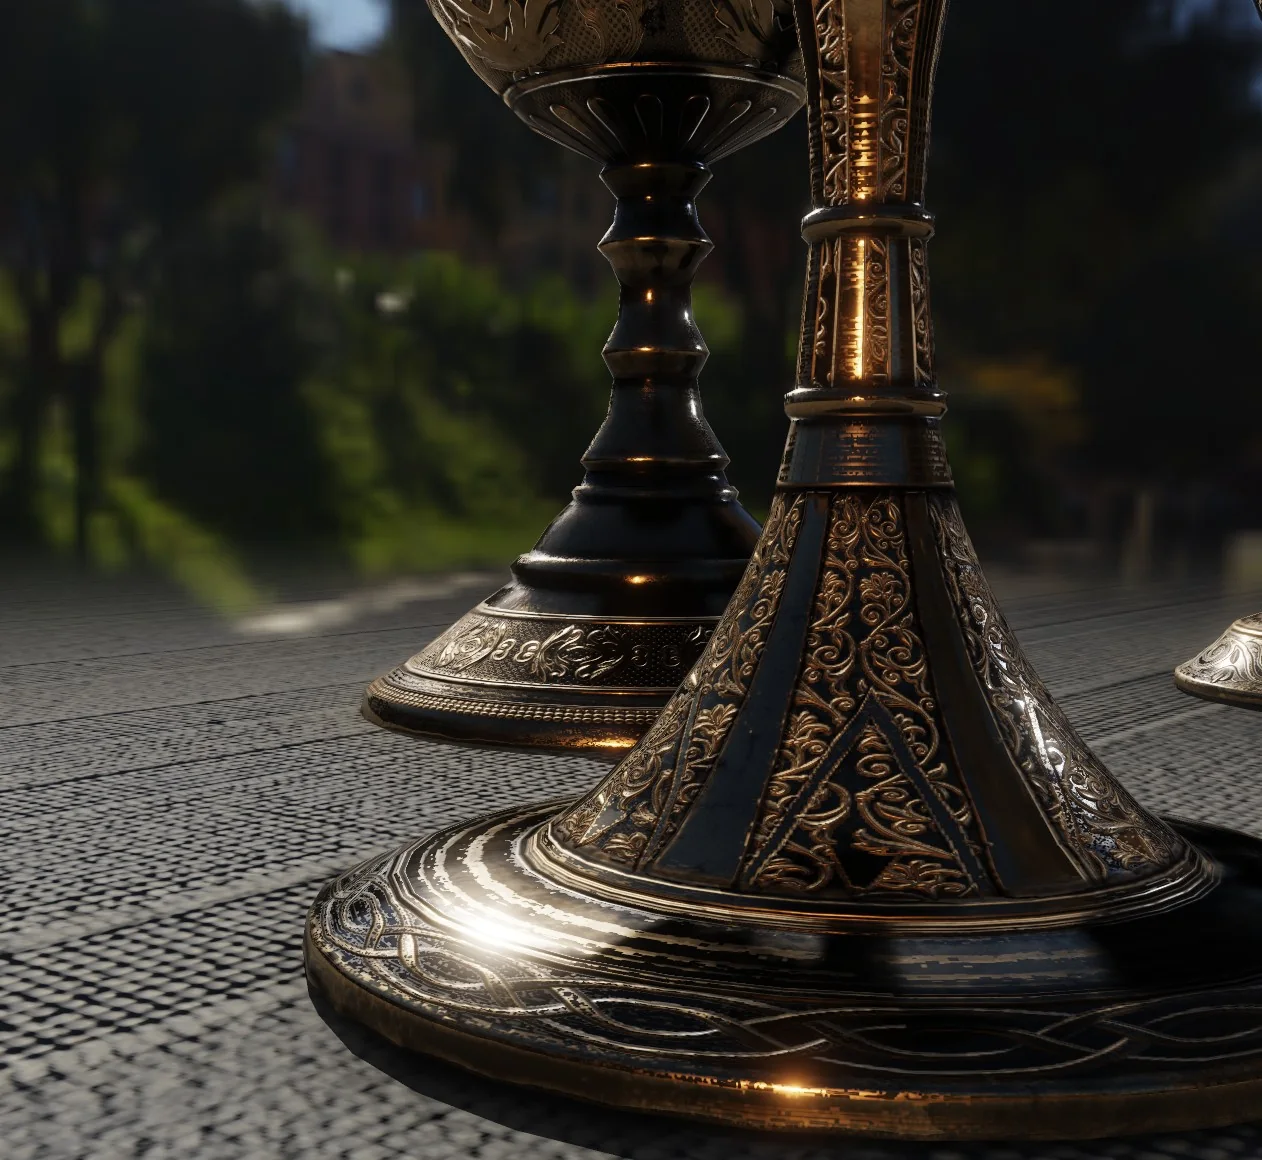
Engraving, filigree and a tight floor pattern stay readable into the distance. Roughness covers the detail a pixel actually contains, so highlights hold steady on bump maps and on small features, and a mirror is still a mirror.
Inspection views
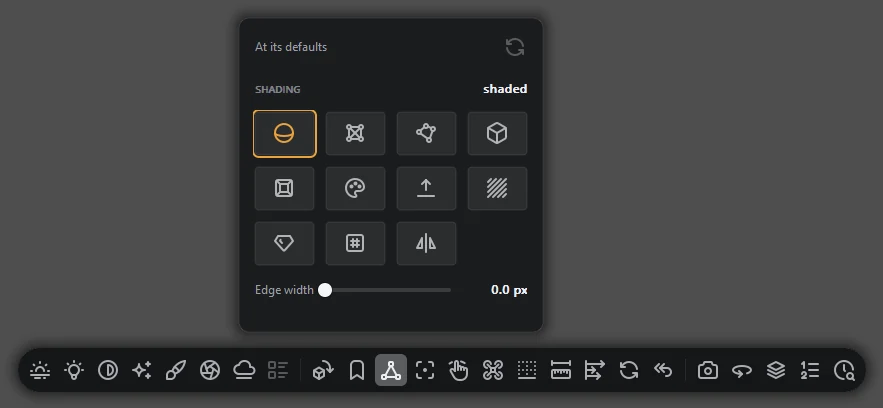
Views that answer a question about the model rather than making a picture of it.
Shaded, four wireframe variants including a see-through one, normals, UVs, albedo, depth, roughness and metalness. Normals show which way each surface faces, so a flipped face shows at once. Roughness and metalness show the maps themselves.
These views read buffers the renderer already fills, so switching costs only the redraw.
The file's own numbers sit alongside: format, triangles, vertices, materials, textures, bounding size on three axes, and which way is up in the file. The last explains a model lying on its side: it was authored Z-up.
Origin and scale
Two overlays: the gnomon marks the model's origin and axes, and the scale reference puts a known size beside it.
The gnomon draws the model's origin and its three axes. It shows whether the file was exported about the expected point, and which way is up. A model that pivots oddly when orbited has its origin somewhere else, and the gnomon shows where.
The scale reference draws a box one grid cell across beside the model, and a human figure where a person is the better yardstick. Neither appears in a capture unless left on.
Camera and framing
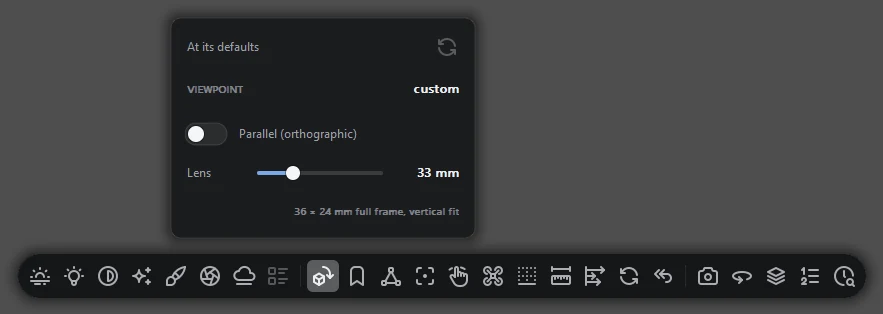
Eight preset viewpoints: front, back, left, right, top, bottom, and two isometrics.
All eight render orthographic. A front view with perspective in it is not a front view, and an isometric needs equal lengths along the three axes to draw equal.
The two isometrics are different projections. One is true isometric: the camera 35.264° above the ground at 45° round, so the three world axes fall 120° apart on screen. The other is the 2:1 pixel-art isometric of 2D engines, at 30°, where a square ground tile projects to a diamond twice as wide as it is tall.
Presets give the same view whether the file arrived Y-up or Z-up.
Focal length runs 12 mm to 400 mm against a 36 × 24 mm full-frame sensor, default 33 mm. The slider is geometric along its track, so the wide end is not crushed into the first few millimetres. A short lens exaggerates depth; a long lens flattens it.
A parallel projection switch removes perspective on any camera, not only the presets. It matters most for a sprite sheet: shot through a lens, each cell's silhouette is scaled by its own depth and the cells do not sit on the engine's grid.
Three bookmark slots hold cameras for the current file. Each slot has a button that goes to the saved view and one that replaces it with the current view. Bookmarks are stored per file.
Orbit is the default camera. A free camera, with its own look and pan, is the alternative for getting inside a model.
Recent files
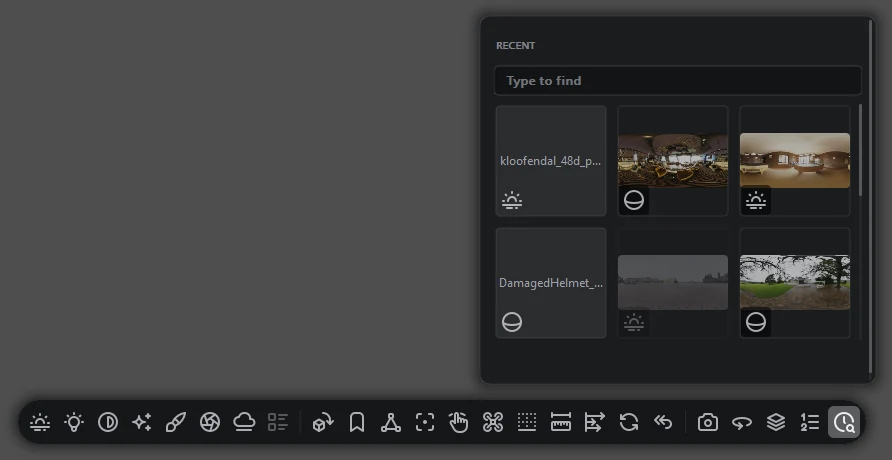
A grid of recently opened files. Each tile shows the model rather than a filename.
The tile picture is the last frame that model was drawn at, downsampled; the list never renders on its own. A search box filters the list as you type. A file that has moved or been deleted is marked rather than dropped.
Captures and turntables
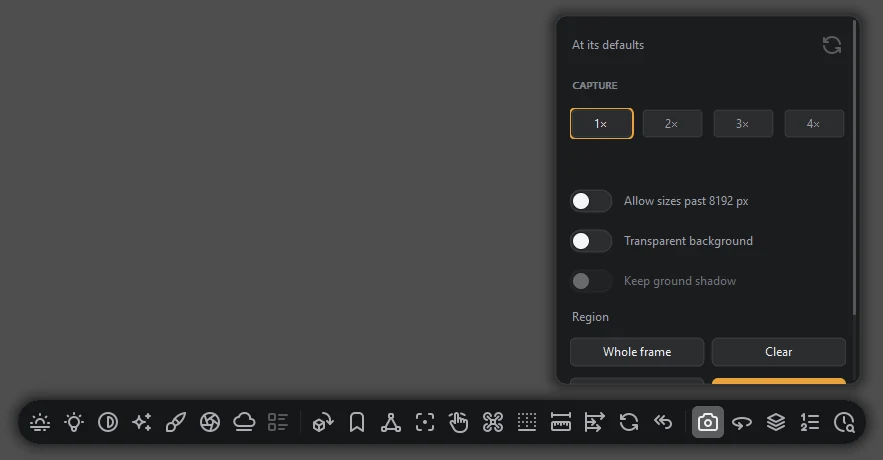
A still leaves the pane as a PNG at the framing on screen.
Nothing reads the screen. The picture is rendered again from the pane's camera and settings, so the toolbar, the popover and the loading bar are not in it. The capture size is a whole multiple of the pane on both axes, so the framing is kept.
Stills go past 8K. They are rendered in tiles and joined, so resolution is not limited by video memory.
A turntable turns the object while the light stays in place. Each frame is the same still the save button takes, at its own size and sample budget.
It writes a numbered PNG sequence by default, or an APNG, a GIF or an MP4. A shadow-catcher floor gives a transparent background; only the PNG sequence and the APNG carry it. An MP4 has no alpha channel and a GIF has one bit of it.
MP4 needs the Media Feature Pack, which Windows N and KN editions do not ship. Where it is missing the card says so and the other three formats still write.
You set the turn speed in degrees per second, the elevation, the frame count, the output size and the samples per frame. The card states the total before you start, for example 120 frames at 900 × 460 and 32 samples.
Shot templates
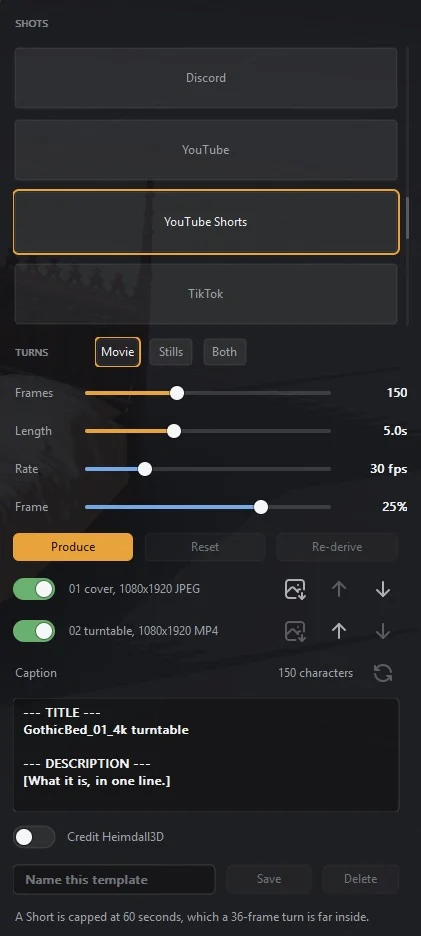
Pick a destination and press Produce. The card writes every image and turnaround that destination asks for, at the size it states. YouTube Shorts gets a 1080 × 1920 JPEG cover and a 1080 × 1920 MP4 turn.
Each template names the page its numbers were read from. A value outside a stated band is allowed. The card then stops calling it that destination's requirement. Eight destinations publish no rules, so those templates carry none.
Frames, length and rate are three views of one turn, so moving one moves the other two. Frame sets the room around the subject, default 25%. A turn writes a movie, numbered stills, or both.
The caption is generated and counted against the destination's limit, with a credit line you can switch on. An edited template saves under a name of your choosing.
File formats
Each extension listed here has its own decoder.
Models and motion capture. glTF and GLB, FBX, VRM, OBJ with its
.mtl, PLY, COLLADA, 3DS, 3MF, STL, BVH. A rigged COLLADA file opens in bind
pose; its animation is not read yet.
Images. HDR and PIC, EXR including single-channel, PFM, DDS, KTX2 and Basis, TIFF.
Textures. Base colour, normal, occlusion, emissive, opacity and alpha cutout, transparency factors, and metallic-roughness. Separate metal and rough maps are packed automatically.
A format is listed only when it arrives with its textures and its animation. Geometry alone is not counted as support. No USD or Alembic yet. Upcoming: USD, Alembic, AMF and VRML97.
What comes next
Heimdall3D is built by one person. This is what is being built, in order.
More formats
COLLADA opens with its geometry, materials, textures and scene graph. Its animation library
and skin controllers are next, so a rigged .dae plays as glTF and FBX do.
Rigging
A model's own skeleton already plays. glTF and FBX bring their bones, bind pose and every clip, resampled onto a 30 Hz grid, and the skinned mesh deforms with them. The mannequin stands in for a file with a skeleton and no mesh.
Next: morph targets, so a face rig animates its shapes as well as its bones, and more than four weights per vertex for dense facial rigs.
After that, inverse kinematics, so a limb is posed by moving its end rather than rotating each bone in the chain. Then editing a clip where it is opened: trimming, retiming, fixing a sliding foot, and writing the result back to a file.
The renderer
Every change to shading is compared against a path-traced reference of the same scene, and the comparison decides whether it ships. Each release closes the distance between the raster path and the reference, so the renderer improves in releases that list no new format.
System requirements
Windows 10 or 11, 64-bit. The Directory Opus plugin needs Directory Opus 13, 64-bit.
No redistributables. The plugin DLL imports only GDI32, KERNEL32,
USER32 and SHELL32, all present on every Windows machine. A build
test fails if that list grows.
Drawing happens in a separate process, so a graphics driver fault cannot take Directory Opus down. The plugin reads the files you browse. Sheets, recordings and screenshots are written where you ask, and nowhere else.
Download Heimdall3D
Version 1.0.15 is available for Windows. The free version includes thumbnails, the preview pane and the viewer window, with no expiry. The full version adds the four export features.
The free version needs no key, account or sign-up. A licence unlocks the four export actions: saving an image, copying a frame to the clipboard, saving a sprite sheet, and recording a turntable or animation clip.
One payment of €49, including VAT, covers the 1.x line with updates included. What the price covers.
| File | Route | Size |
|---|---|---|
| Heimdall3D-1.0.15-setup.exe | Installer | 152 MB |
| Heimdall3D-1.0.15.zip | ZIP | 170 MB |
Use the installer. It runs dopusrt.exe /flushplugins before it copies, and if
Opus is holding a file it says which. It removes an older Heimdall3D plugin so two copies
cannot claim the same file types, and its last page reports what your GPU can do. The ZIP does
none of that.
Neither the installer nor the plugin is code-signed, and there is no plan to sign them.
Windows SmartScreen therefore shows an unknown publisher warning on the downloaded
.exe. Files extracted from the ZIP get no warning.
Checking what you downloaded
Without a signature, the SHA-256 below is the check that the file is the one built here. Run this in PowerShell in the folder you downloaded to:
Get-FileHash .\Heimdall3D-1.0.15-setup.exe -Algorithm SHA256
The hash must equal the one recorded for that file:
Heimdall3D-1.0.15-setup.exe
610b6f628b54d55075fca41b50052f2f174e49dfd1bbae25bc6f6c7e39c9c24a
Heimdall3D-1.0.15.zip
7e245ced6352dc8180f6f1add9ea3e47a2af40e6c468c3f0ecb0be58e3b3e2a6
A file that hashes to anything else is not the file that was built. Download it again rather than running it.
Found a render that looks wrong?
Send it to me.
A screenshot of the pane and a line about what it should have looked like is enough. The model itself is better, if you can share it. If it is under NDA, tell me the format and what is in it instead.
Optionally, in the Directory Opus Viewers\Heimdall3D folder there is a file
called gpu-info.cmd. Double click it and a window prints your graphics card and
which Heimdall3D features it can run. Paste that in and I can tell whether the problem is the
model or the graphics driver.
A screenshot or a model will not fit in that box. Attach those to a mail instead: quark@heimdall3d.com. Both routes reach the same place.
Be told when the next build lands
One message per release. No news, no offers, and the address goes nowhere else.
Your address is saved when you submit it, and a confirmation link is sent to it. An address that never confirms gets no further mail. You can ask to be removed at any time by mailing quark@heimdall3d.com.